

Before you start this Squarespace website guide: costs and whether it's right for you
Squarespace is an all-in-one system: hosting, security and updates are included — which makes the platform user-friendly, but limits technical flexibility. For design-led SMEs, freelancers and creatives who want a professional website without major maintenance overhead, that is a fair trade-off. Anyone who needs maximum control or a complex CMS is better off elsewhere.
You will find a complete evaluation — with pros, cons, all pricing plans, TWINT compatibility and alternatives — in the article Squarespace for SMEs: Pros and Cons.
Squarespace costs start from ~CHF 14/month (annual billing). If you need a multilingual website, factor in roughly EUR 15/month for Weglot on top. All plans, hidden costs and money-saving tips: Squarespace for SMEs: Pros and Cons.
How do I create a new Squarespace website?
Now we get down to business. This detailed Squarespace guide takes you step by step to a finished website.
Step 1: Sign up and find the perfect template
The first step is signing up and choosing your starting point.
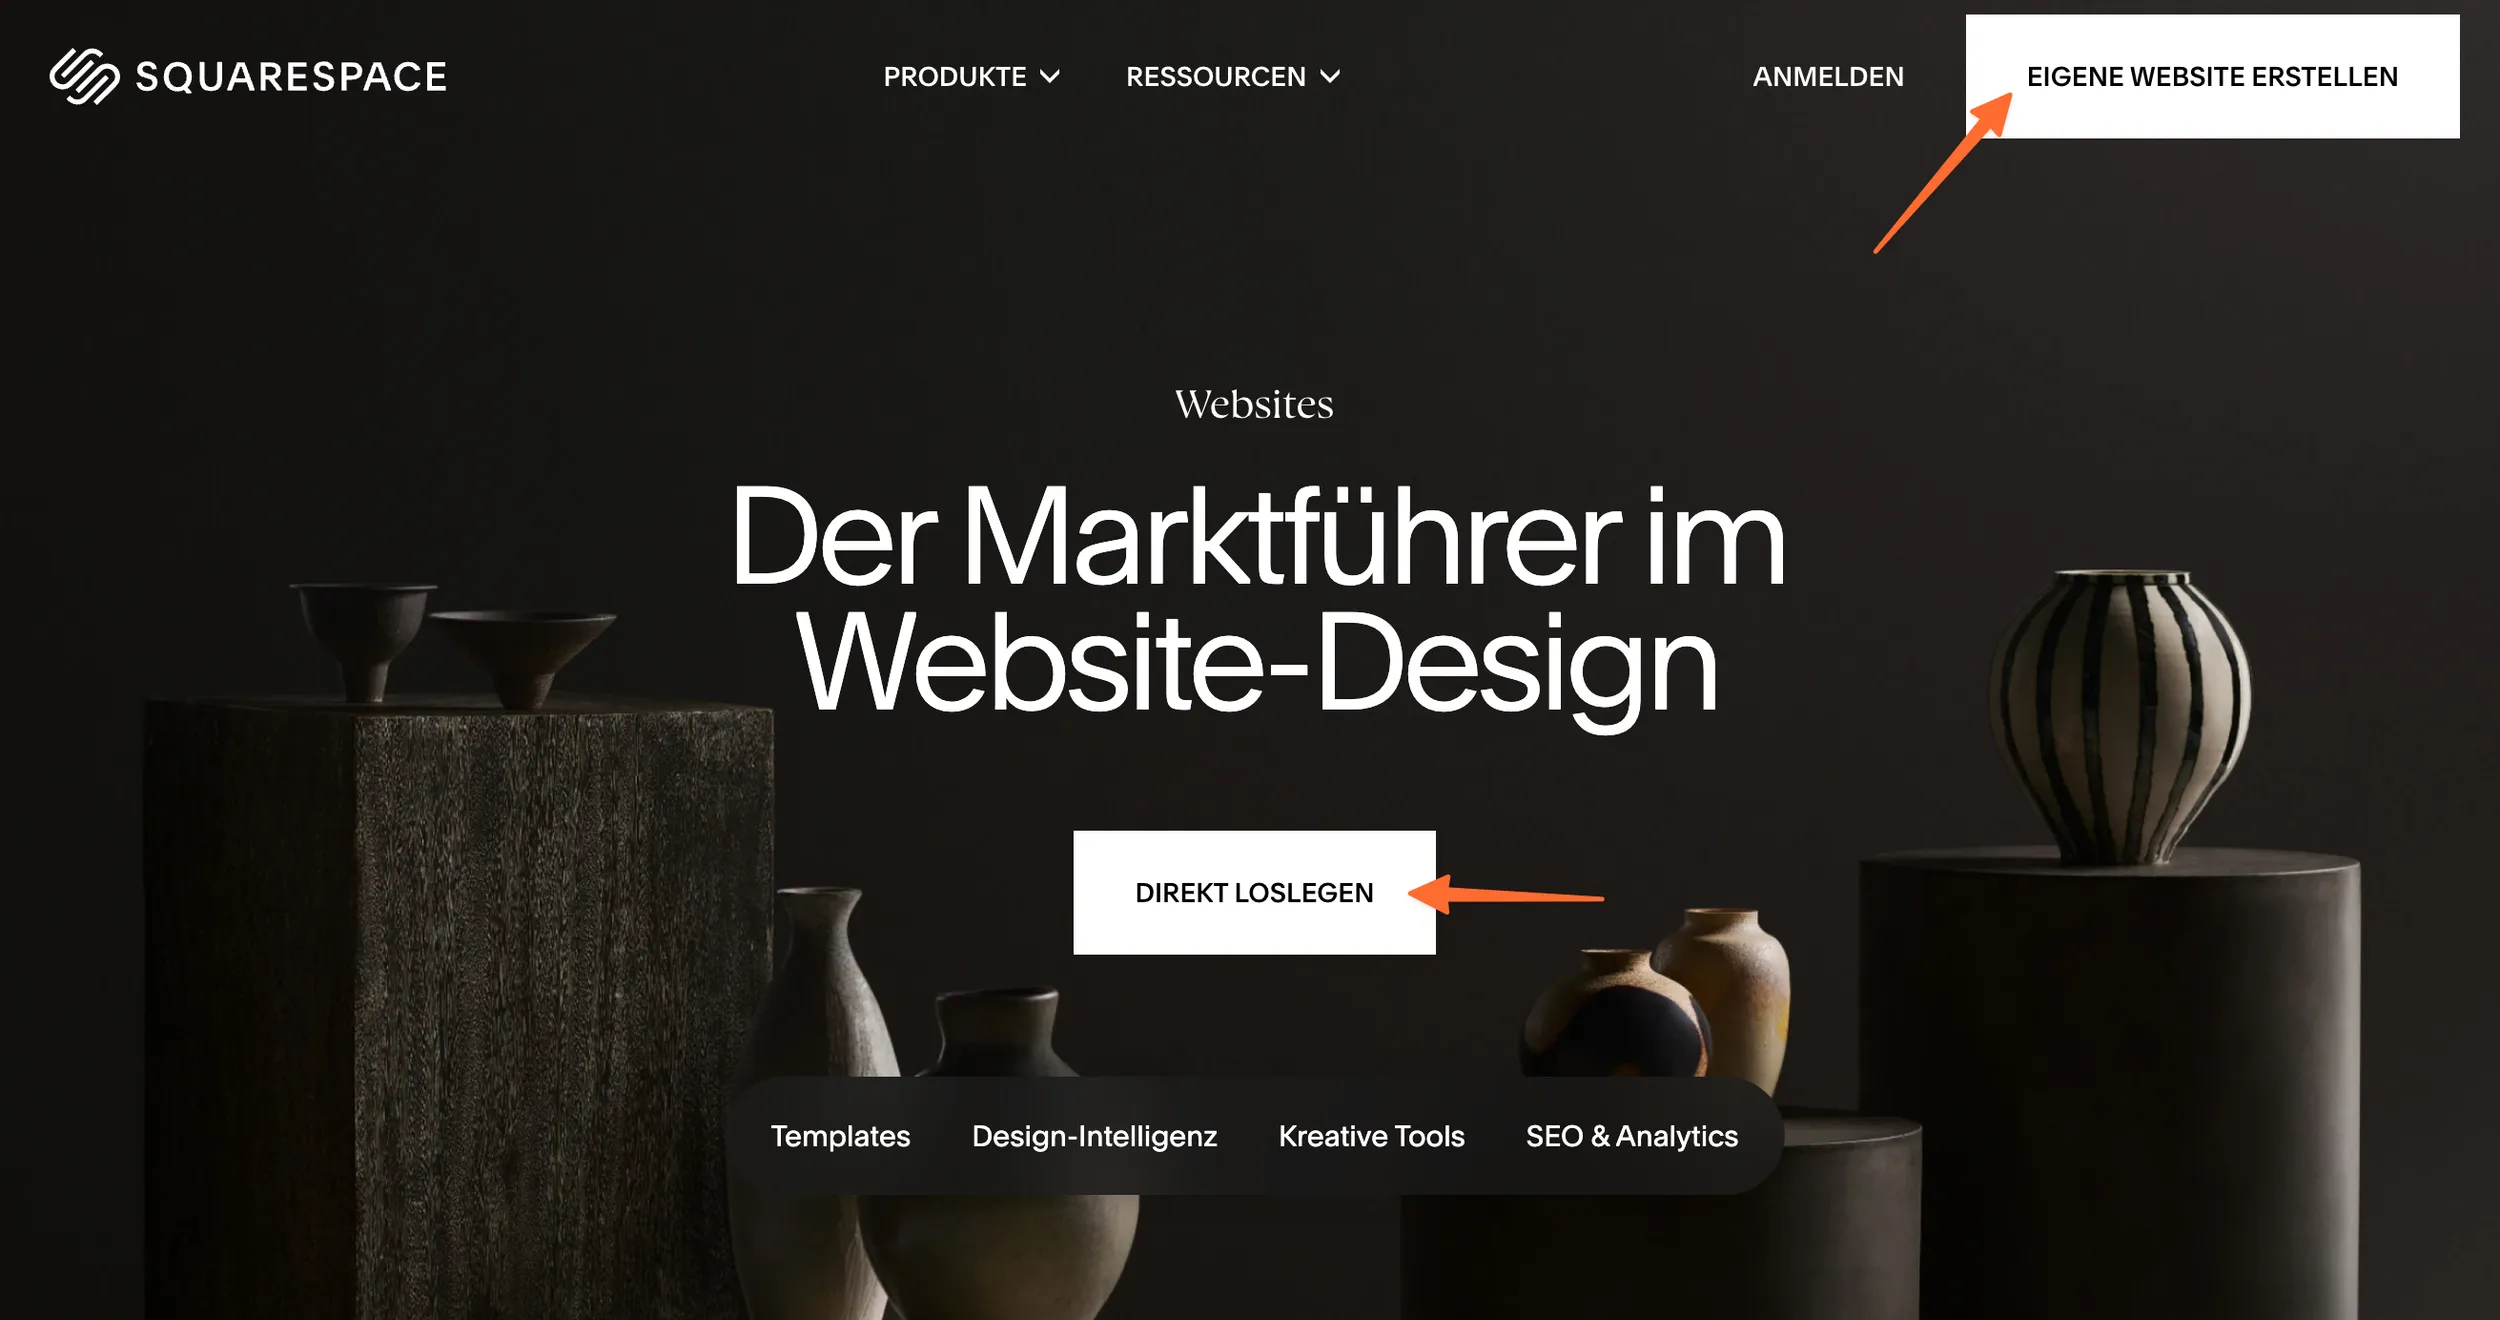
Browse the template shop: Use the preview function to get a feel for the layout and structure of the different designs.
Focus on the layout, not the content: Ignore the demo images, colours and texts. You will replace them anyway. Pay attention instead to which structure best fits your planned content.
Define your goals: Are you looking for a template that is ideal for an image-heavy portfolio? Or do you need a structure that works well for a text-heavy blog? Your goals determine the best starting structure.
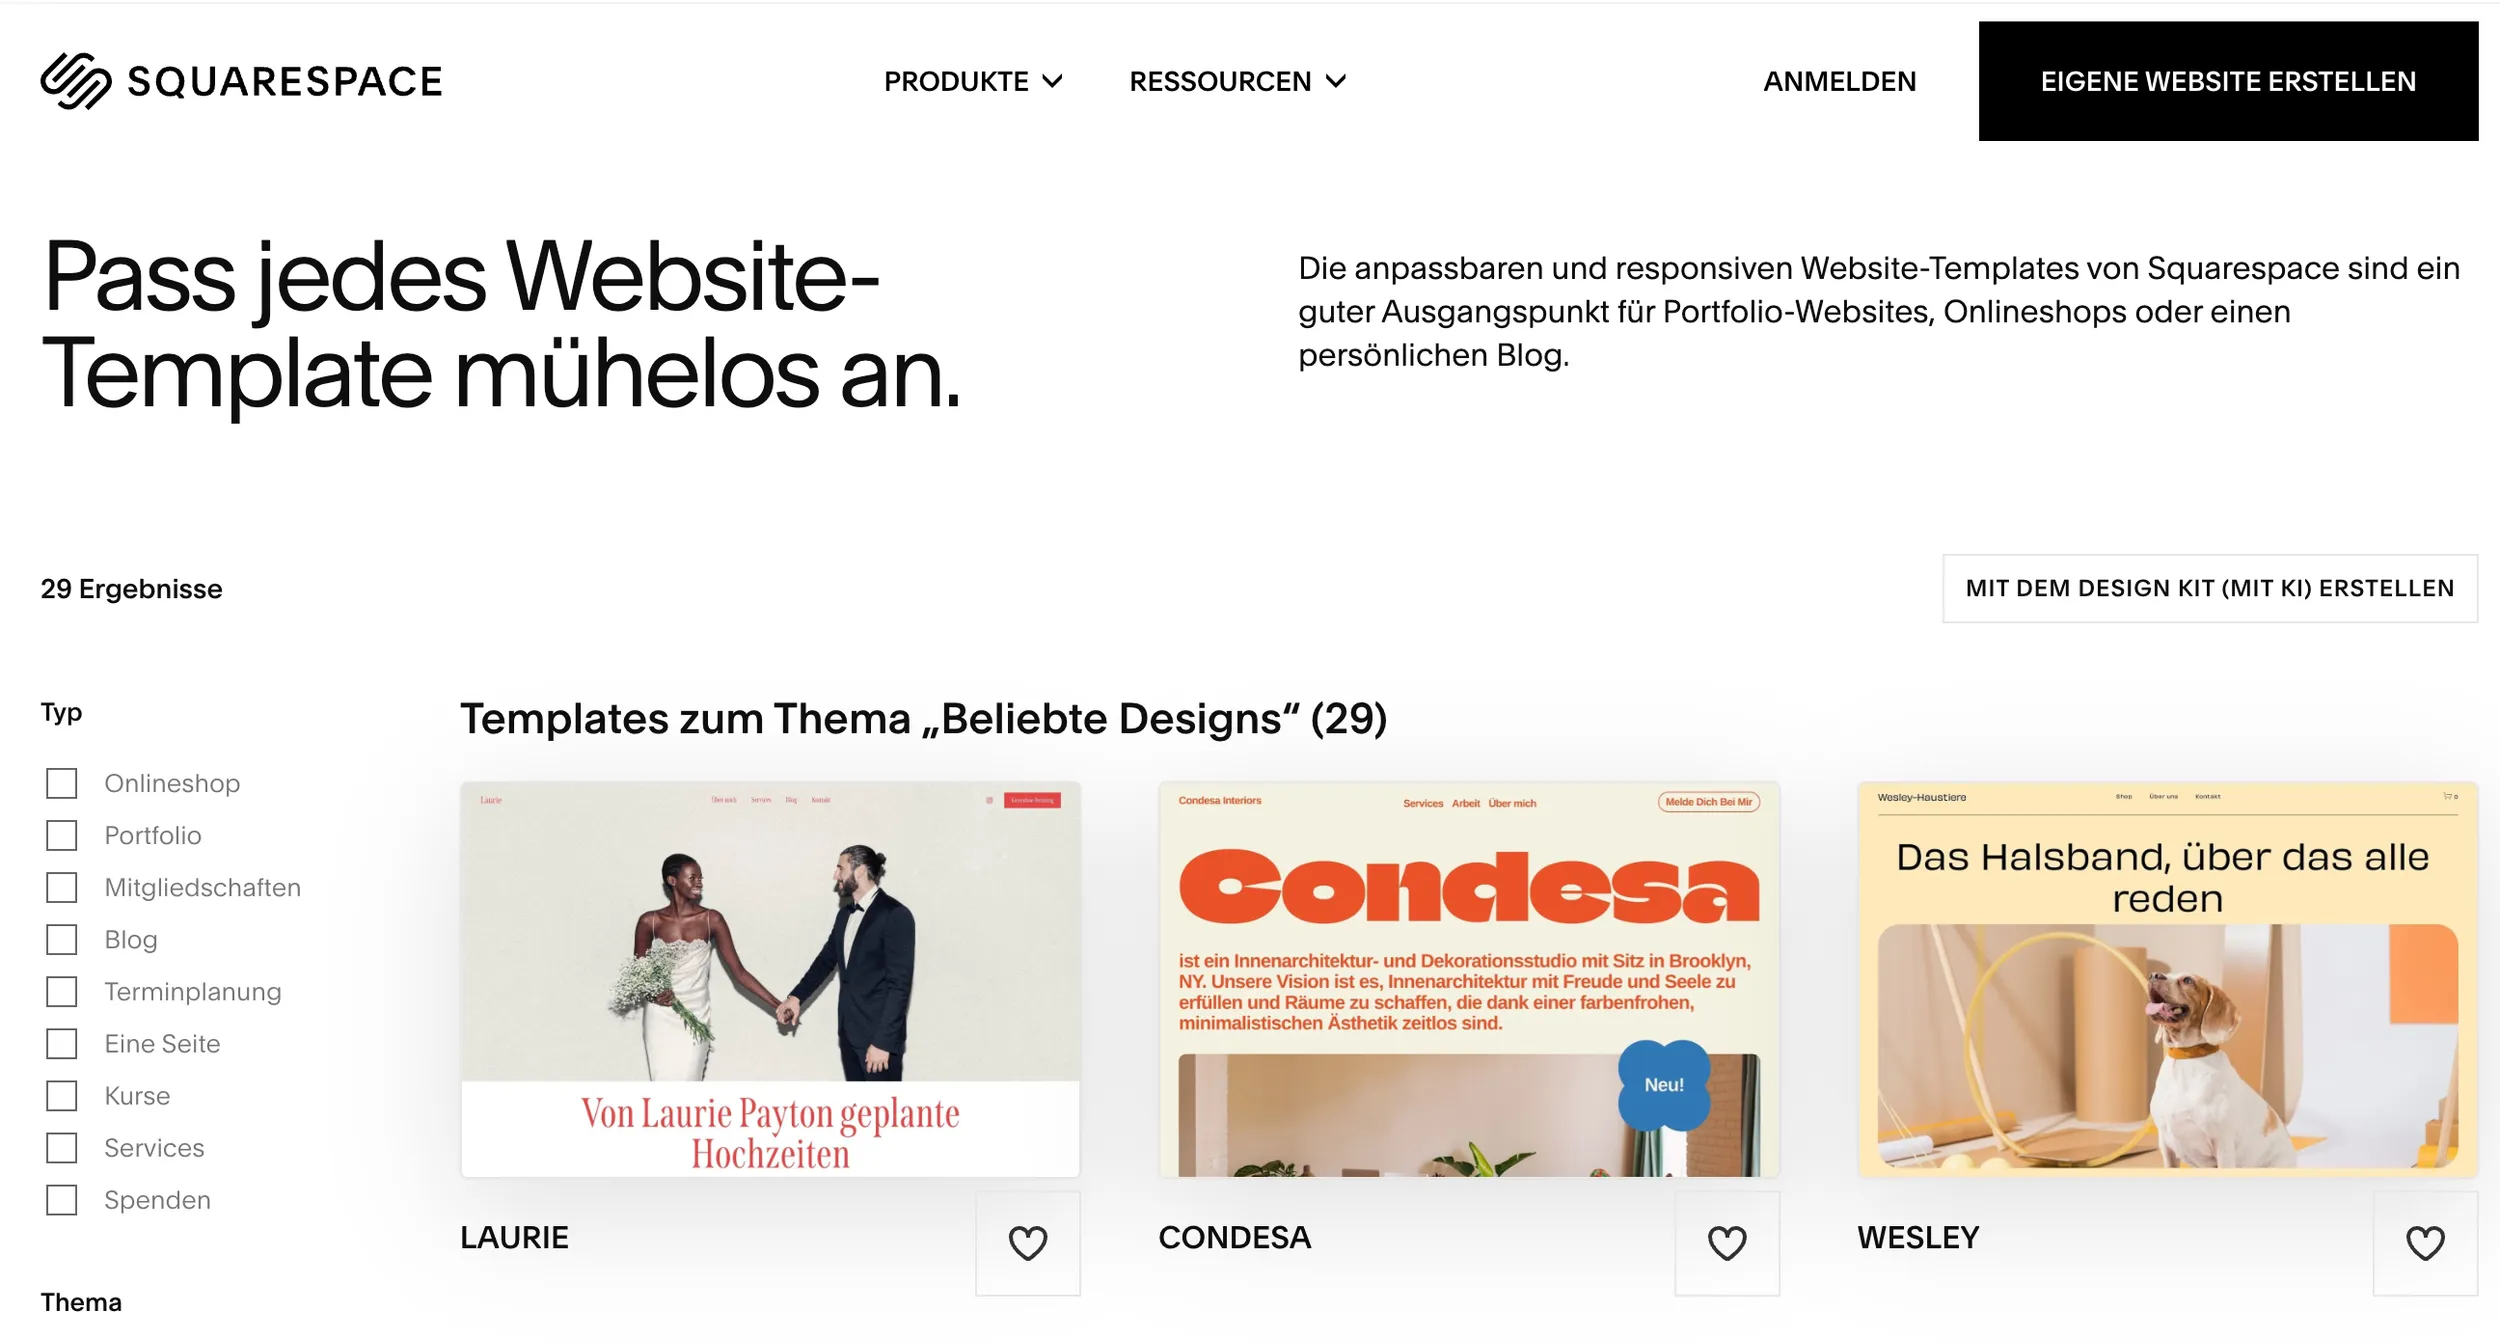
Step 2: The Squarespace cockpit – the editor in detail
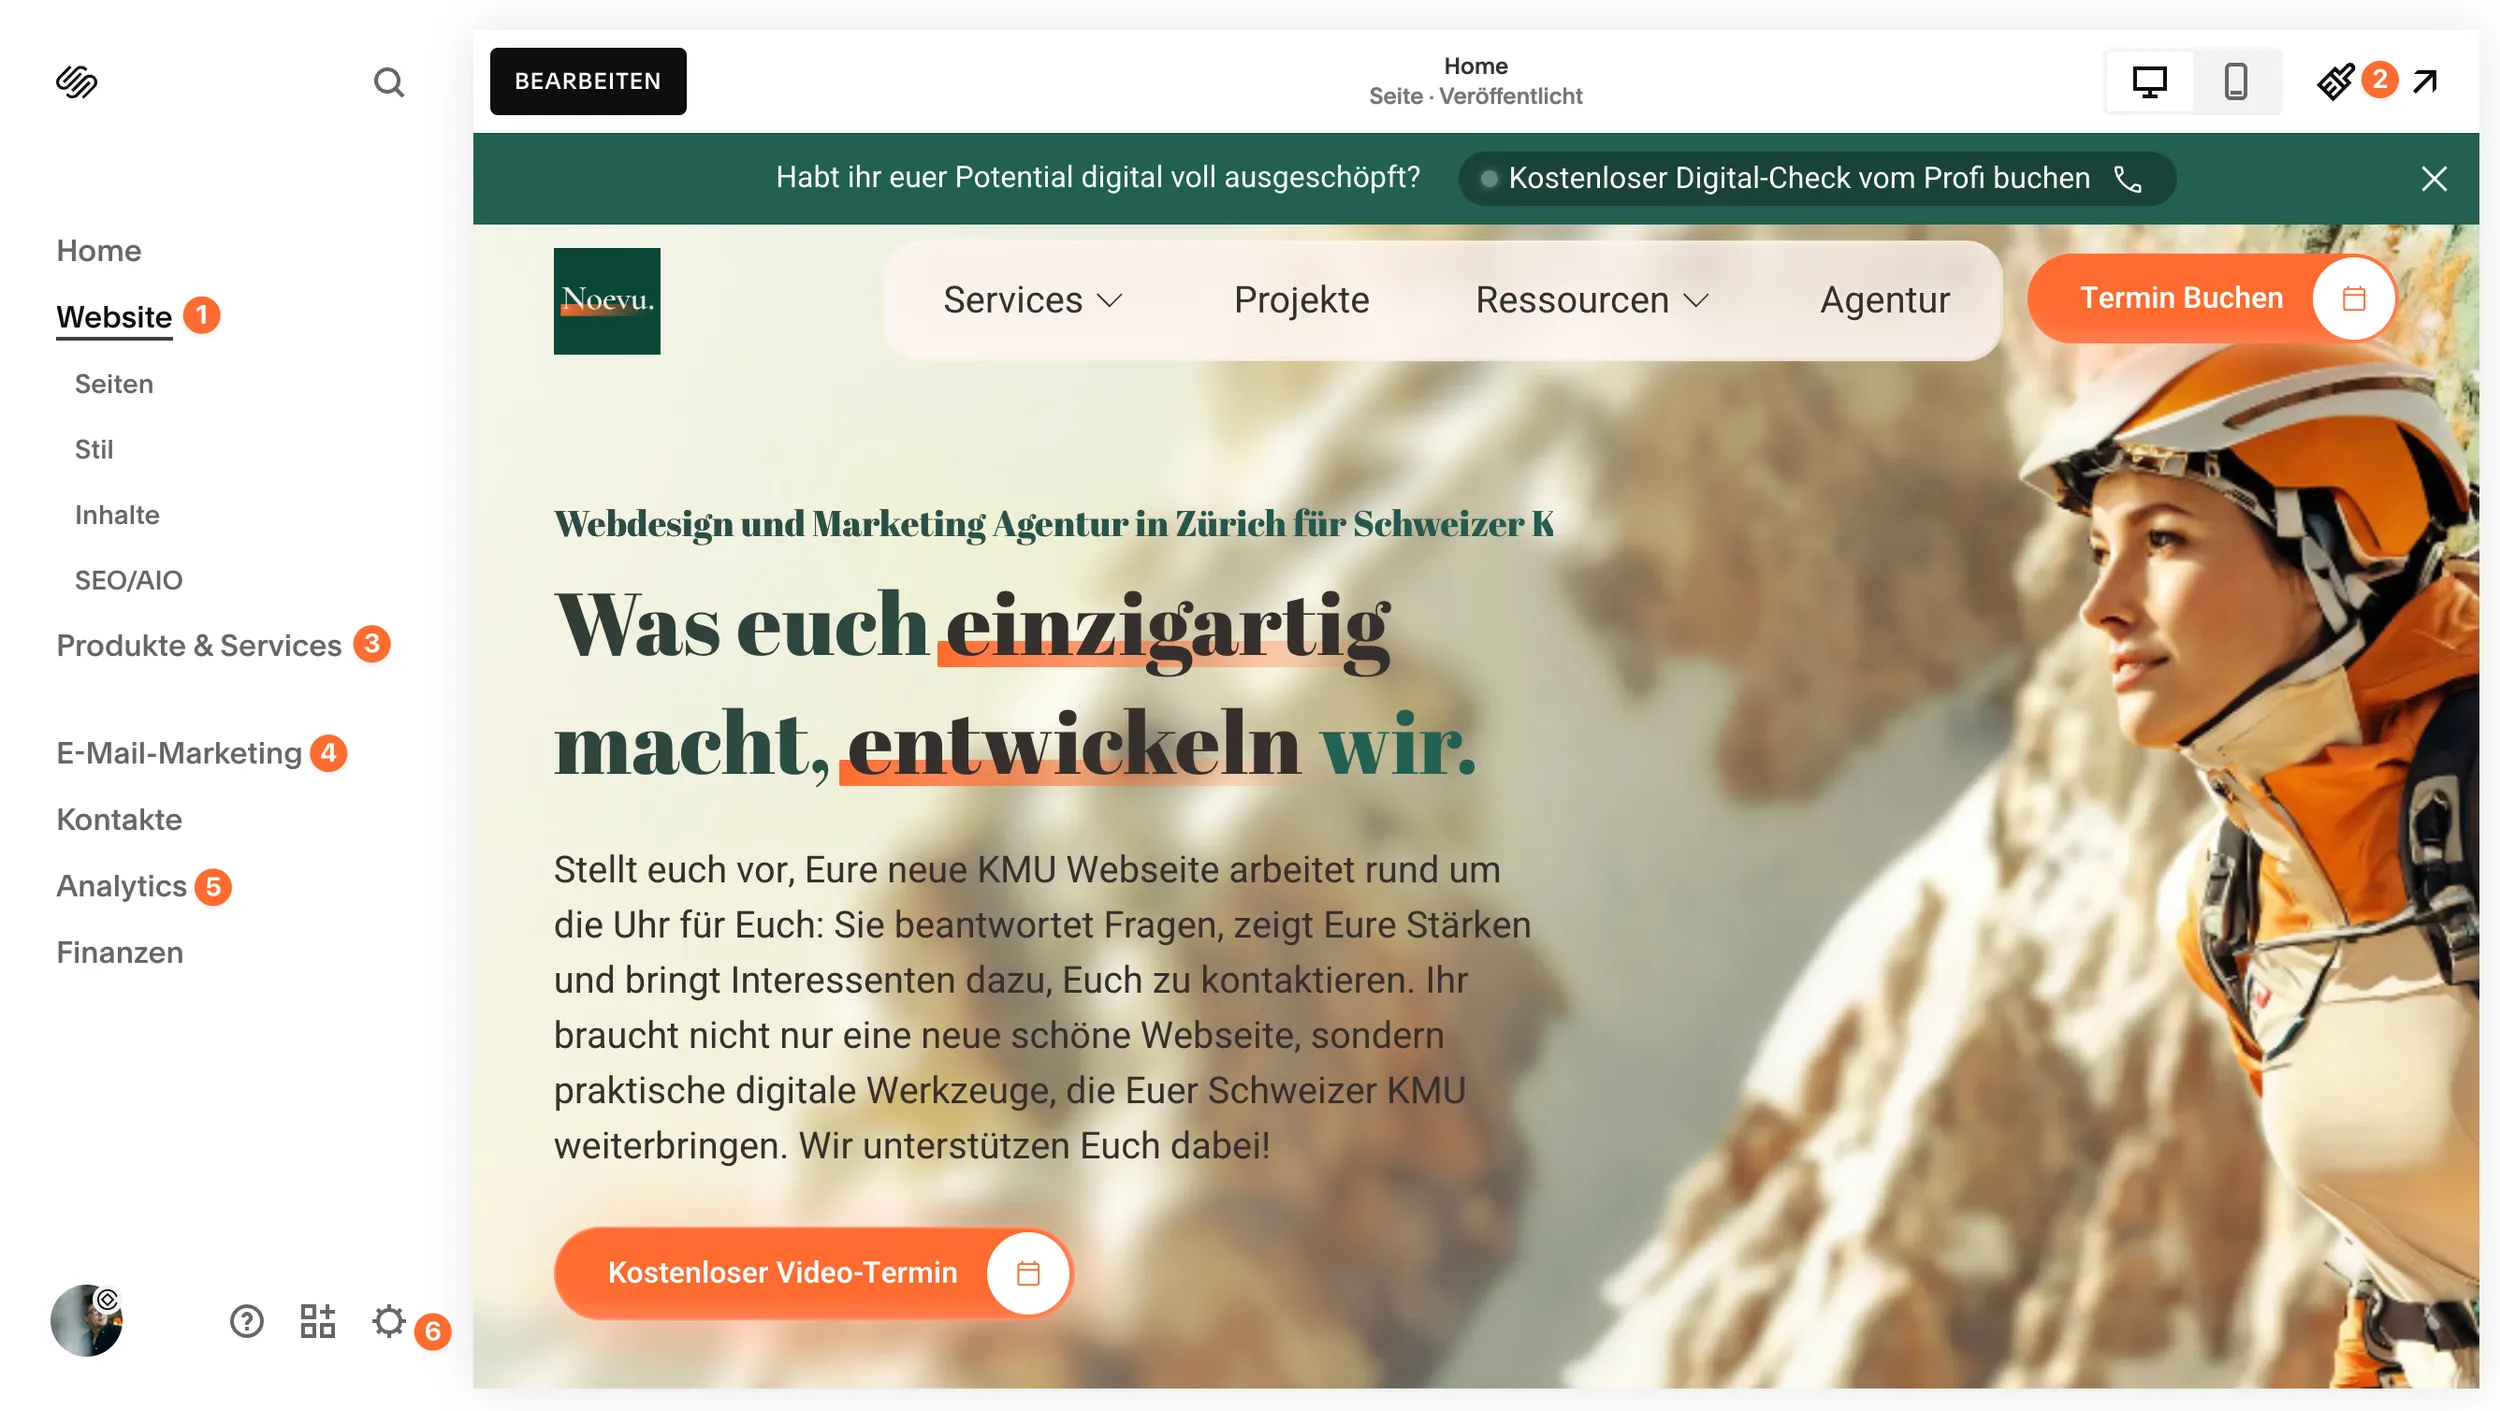
Once you have chosen a template, you land in the Squarespace dashboard, your control centre. On the left side you will find the main menu with the tabs: Pages, Design, E-Commerce, Marketing, Analytics and Settings. This is your command centre for every aspect of your website.
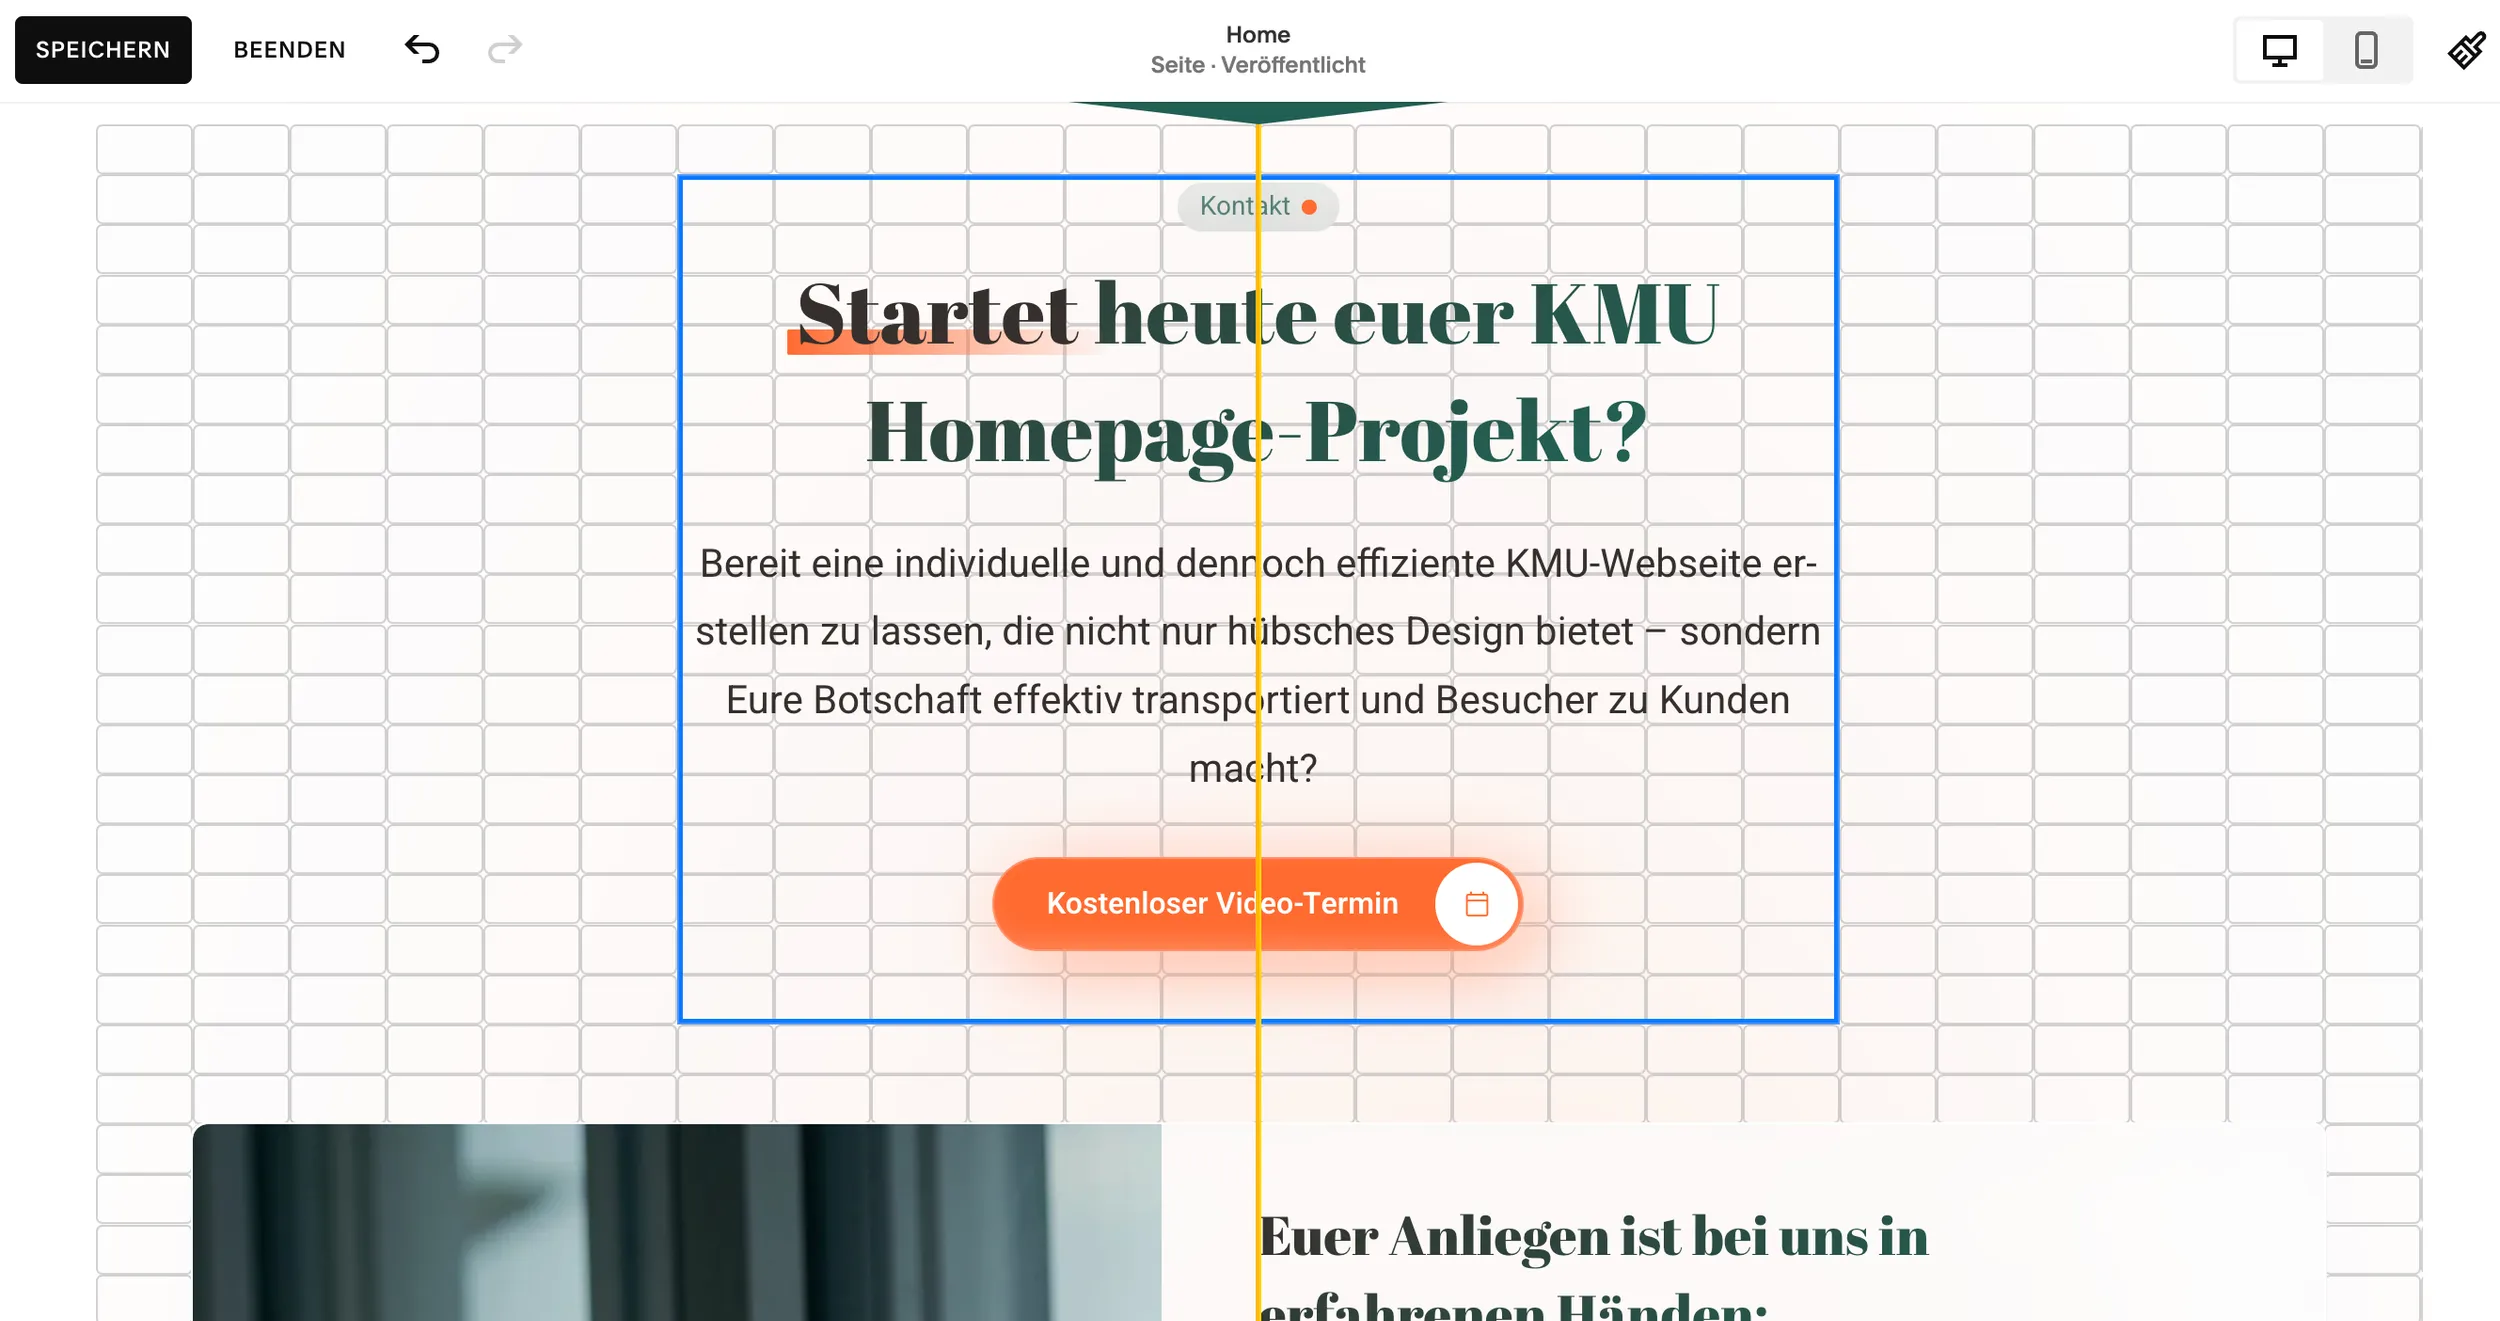
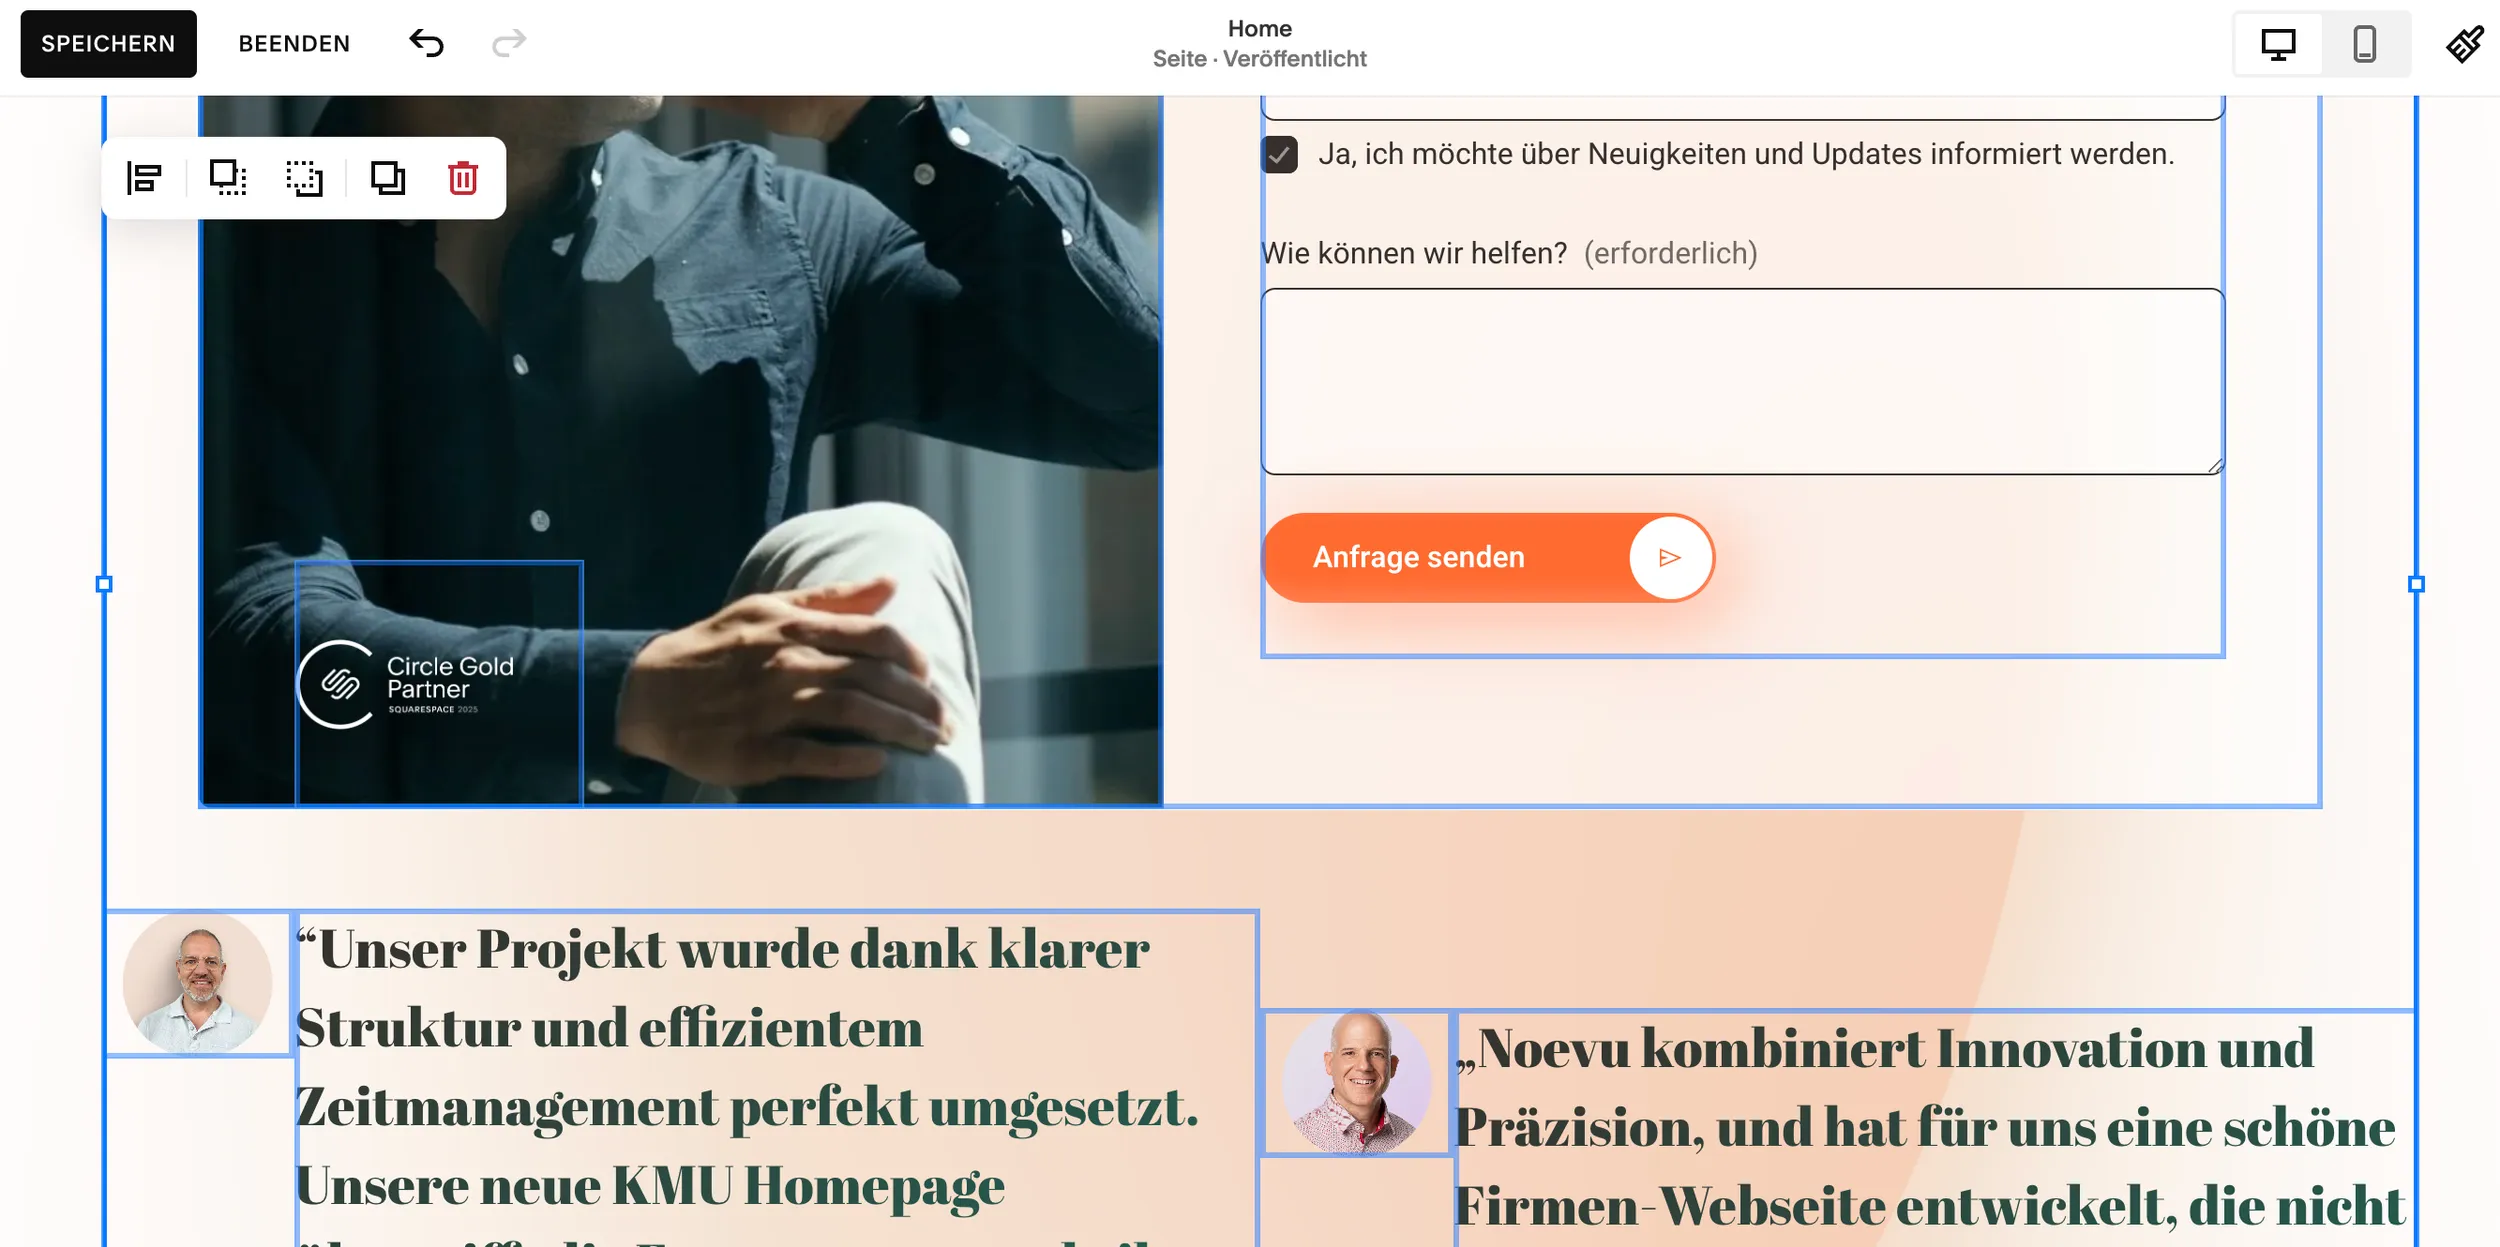
Squarespace's modern editor is called «Fluid Engine» and is a decisive advance over older versions. It gives you a high level of creative freedom:
Drag-and-drop on a grid: You can place content blocks freely on the page. A fine grid in the background helps you align everything cleanly and professionally.
Overlapping elements: Unlike the classic editor, blocks can now overlap, which enables dynamic and modern layouts.
New blocks: The Fluid Engine has introduced powerful new blocks such as the accordion block (for collapsible FAQs), the scrolling block (for marquees) and the form block (for visual shapes).
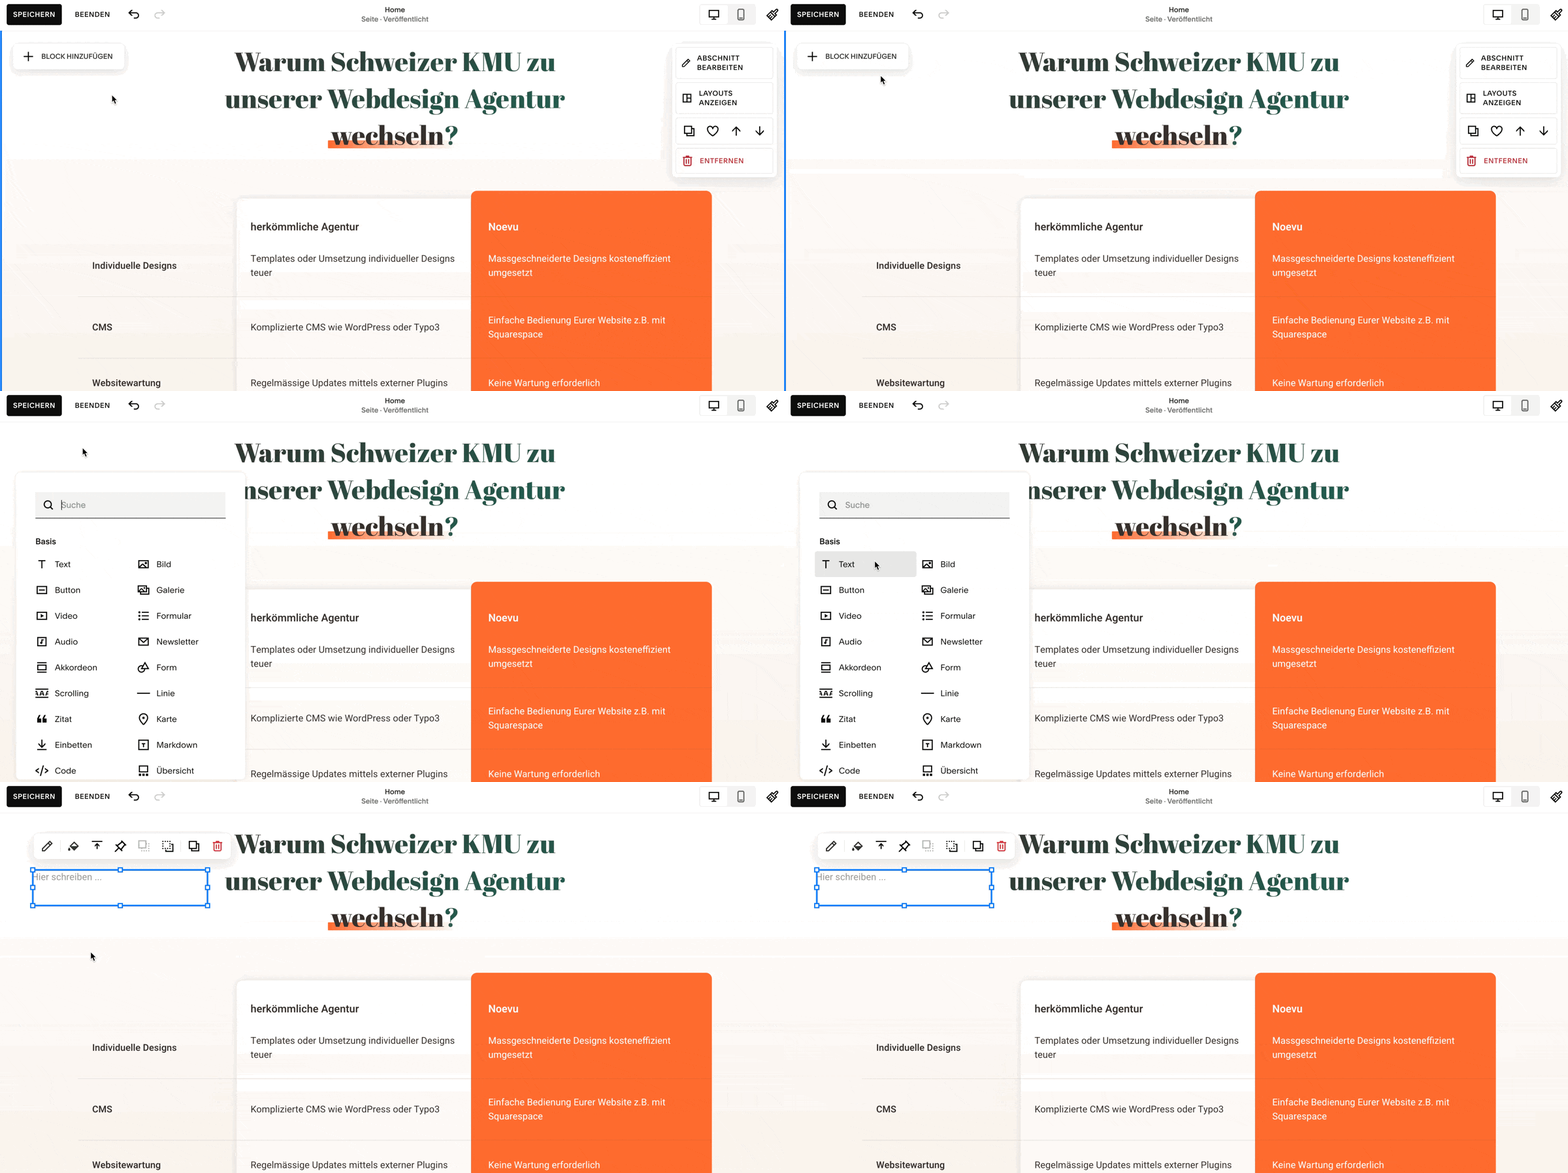
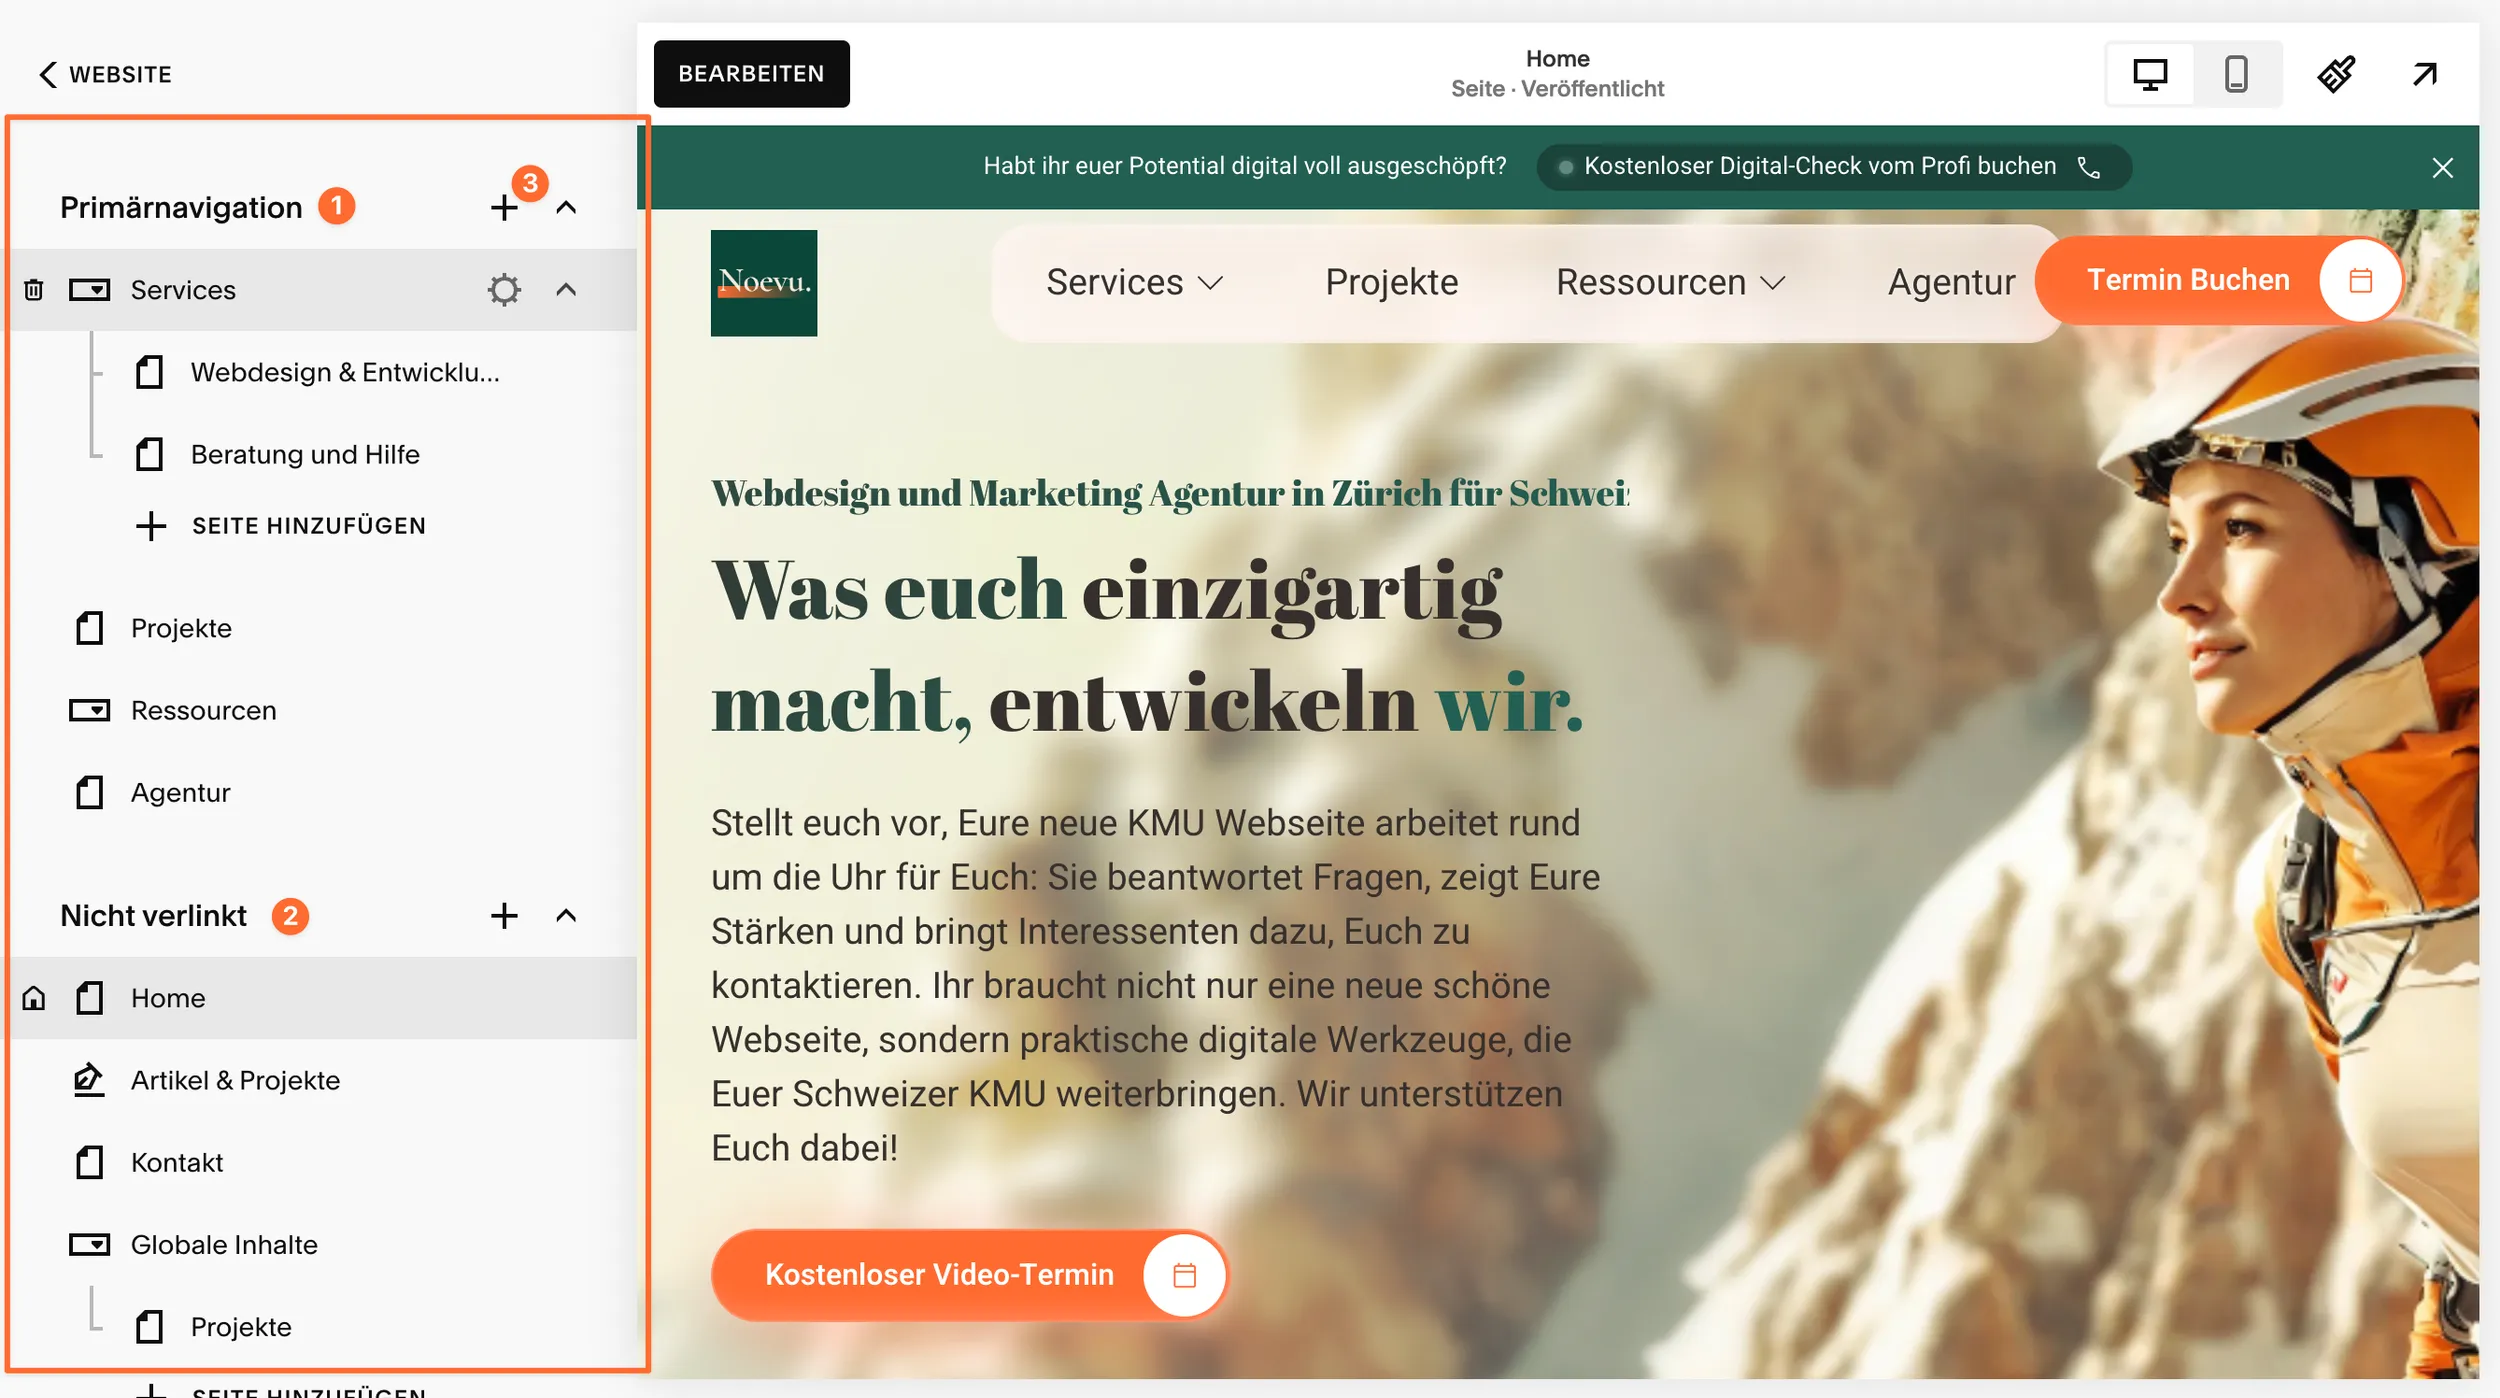

Switch to the editor's mobile view after every section you finish, rather than waiting until launch. Fluid Engine keeps a separate layout for smartphones, and overlapping blocks quickly cover each other there. Moving and resizing blocks in mobile view only affects mobile, while text edits apply to both views. That way you fix the mobile layout without shifting the desktop version.
Step 3: The basic framework – create pages and build navigation
A clear structure is the be-all and end-all of a good website. You set this up in the Pages panel. This panel is divided into two crucial areas, whose function you should definitely know:
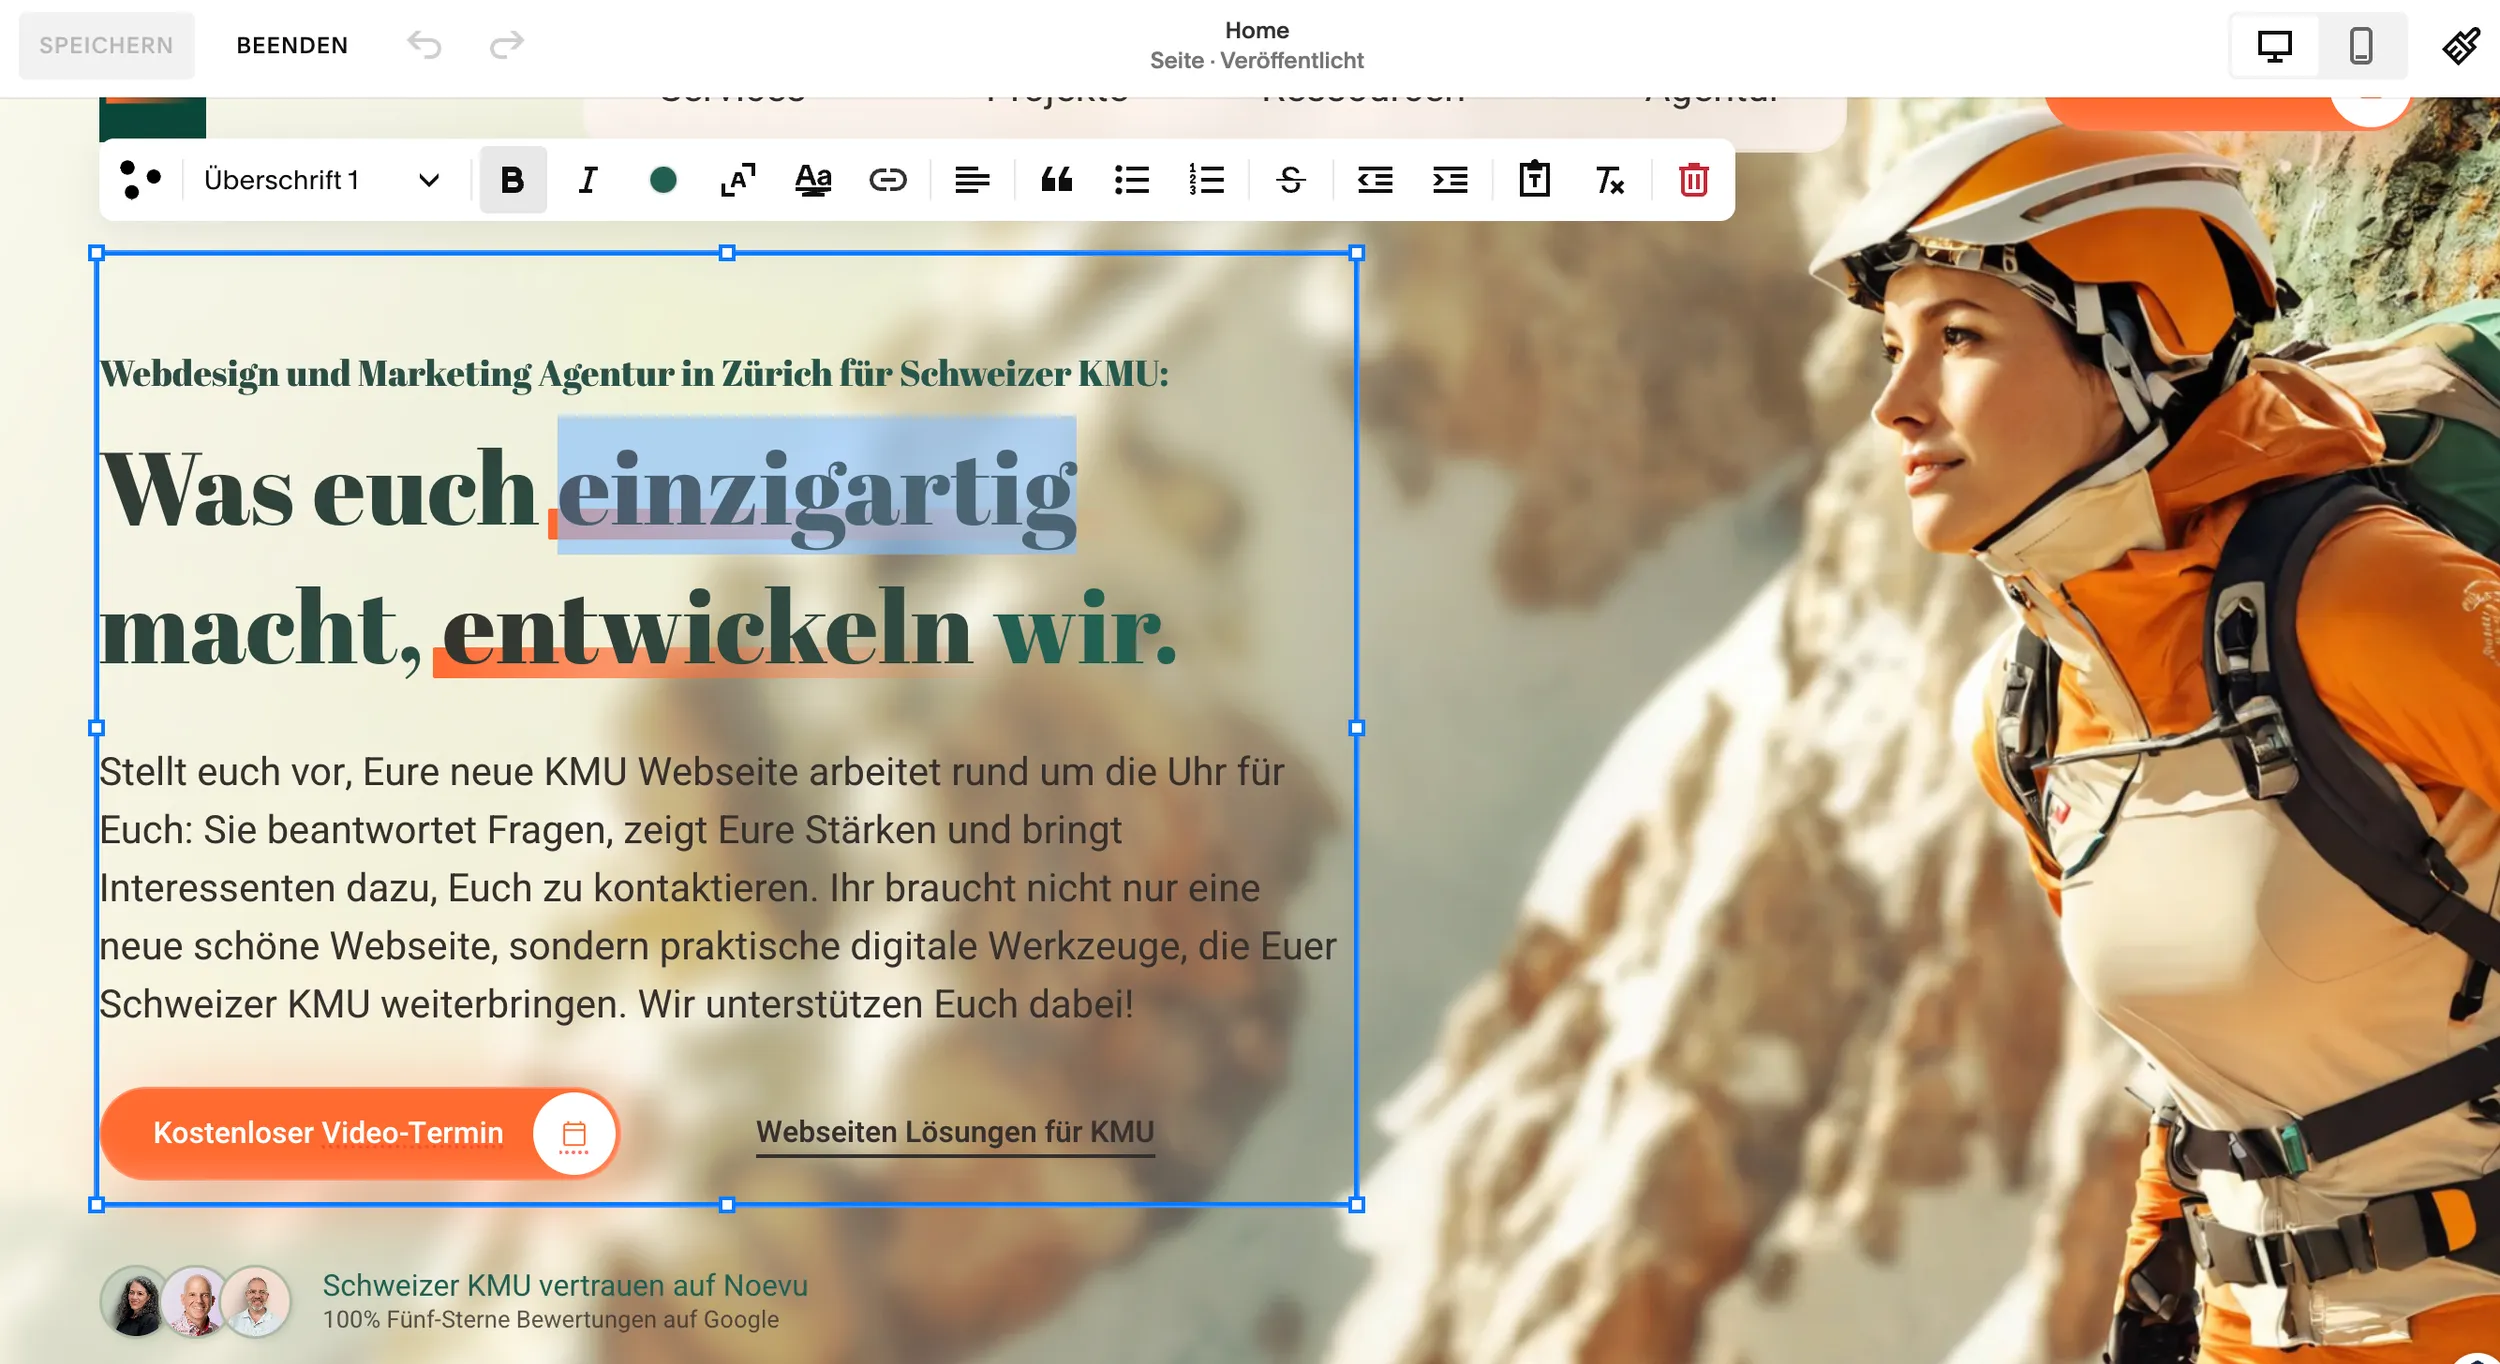
1. Main navigation
- All pages here automatically appear in the main menu of your website (e.g. “Home”, “About us”, “Services”, “Contact”)
2. Not linked
- Pages are live and accessible with a direct link, but do not appear in the navigation
- Ideal for: legal pages, campaign landing pages, “thank you” pages or pages in progress
3. Add pages
- Blank page: a completely empty canvas
- Page layouts: predefined layouts for “Contact”, “About us” or “Team”
- Collection pages: blog or portfolio pages that organize subpages
You can change the order of the pages using drag-and-drop. To create a drop-down menu, simply drag a page slightly to the right under another page.
Step 4: Bring content to life with sections and blocks
Each page of your website consists of horizontal sections, which in turn are filled with blocks.
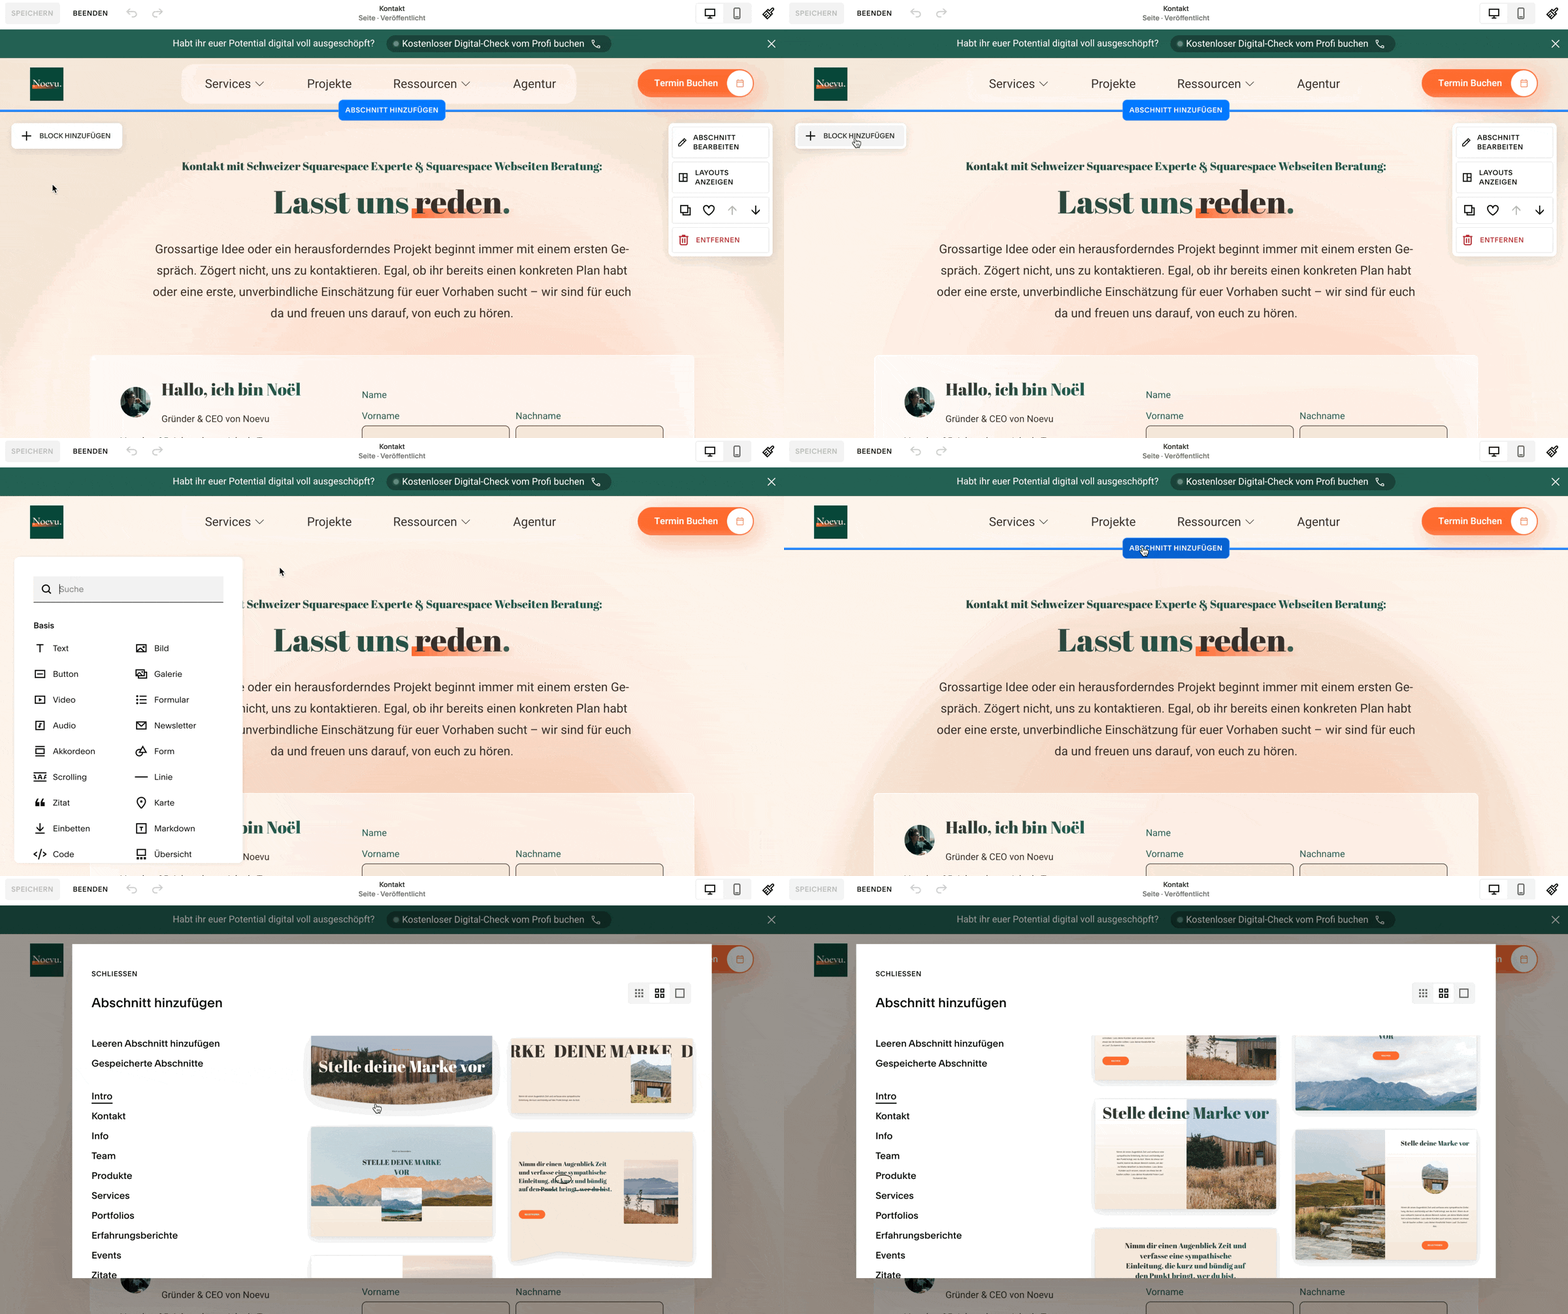
Sections: In edit mode, click «Add section» between two sections to create a new area. Each section can have its own background (colour, image or video) and its own layout.
Blocks: Blocks are the building blocks of your content. Click «Add block» in a section to open the block menu. The most important blocks are:
- Text: for paragraphs, headings and lists
- Image: for uploading individual images
- Gallery: for attractive presentations of multiple images
- Button: for clear calls to action
- Form: to collect contact requests and sign-ups
- Video & Audio: for embedding media from YouTube or for podcasts
- Summary block: a powerful block that pulls in content from other pages
Step 5: Your design, your brand – adjust colours, fonts and styles
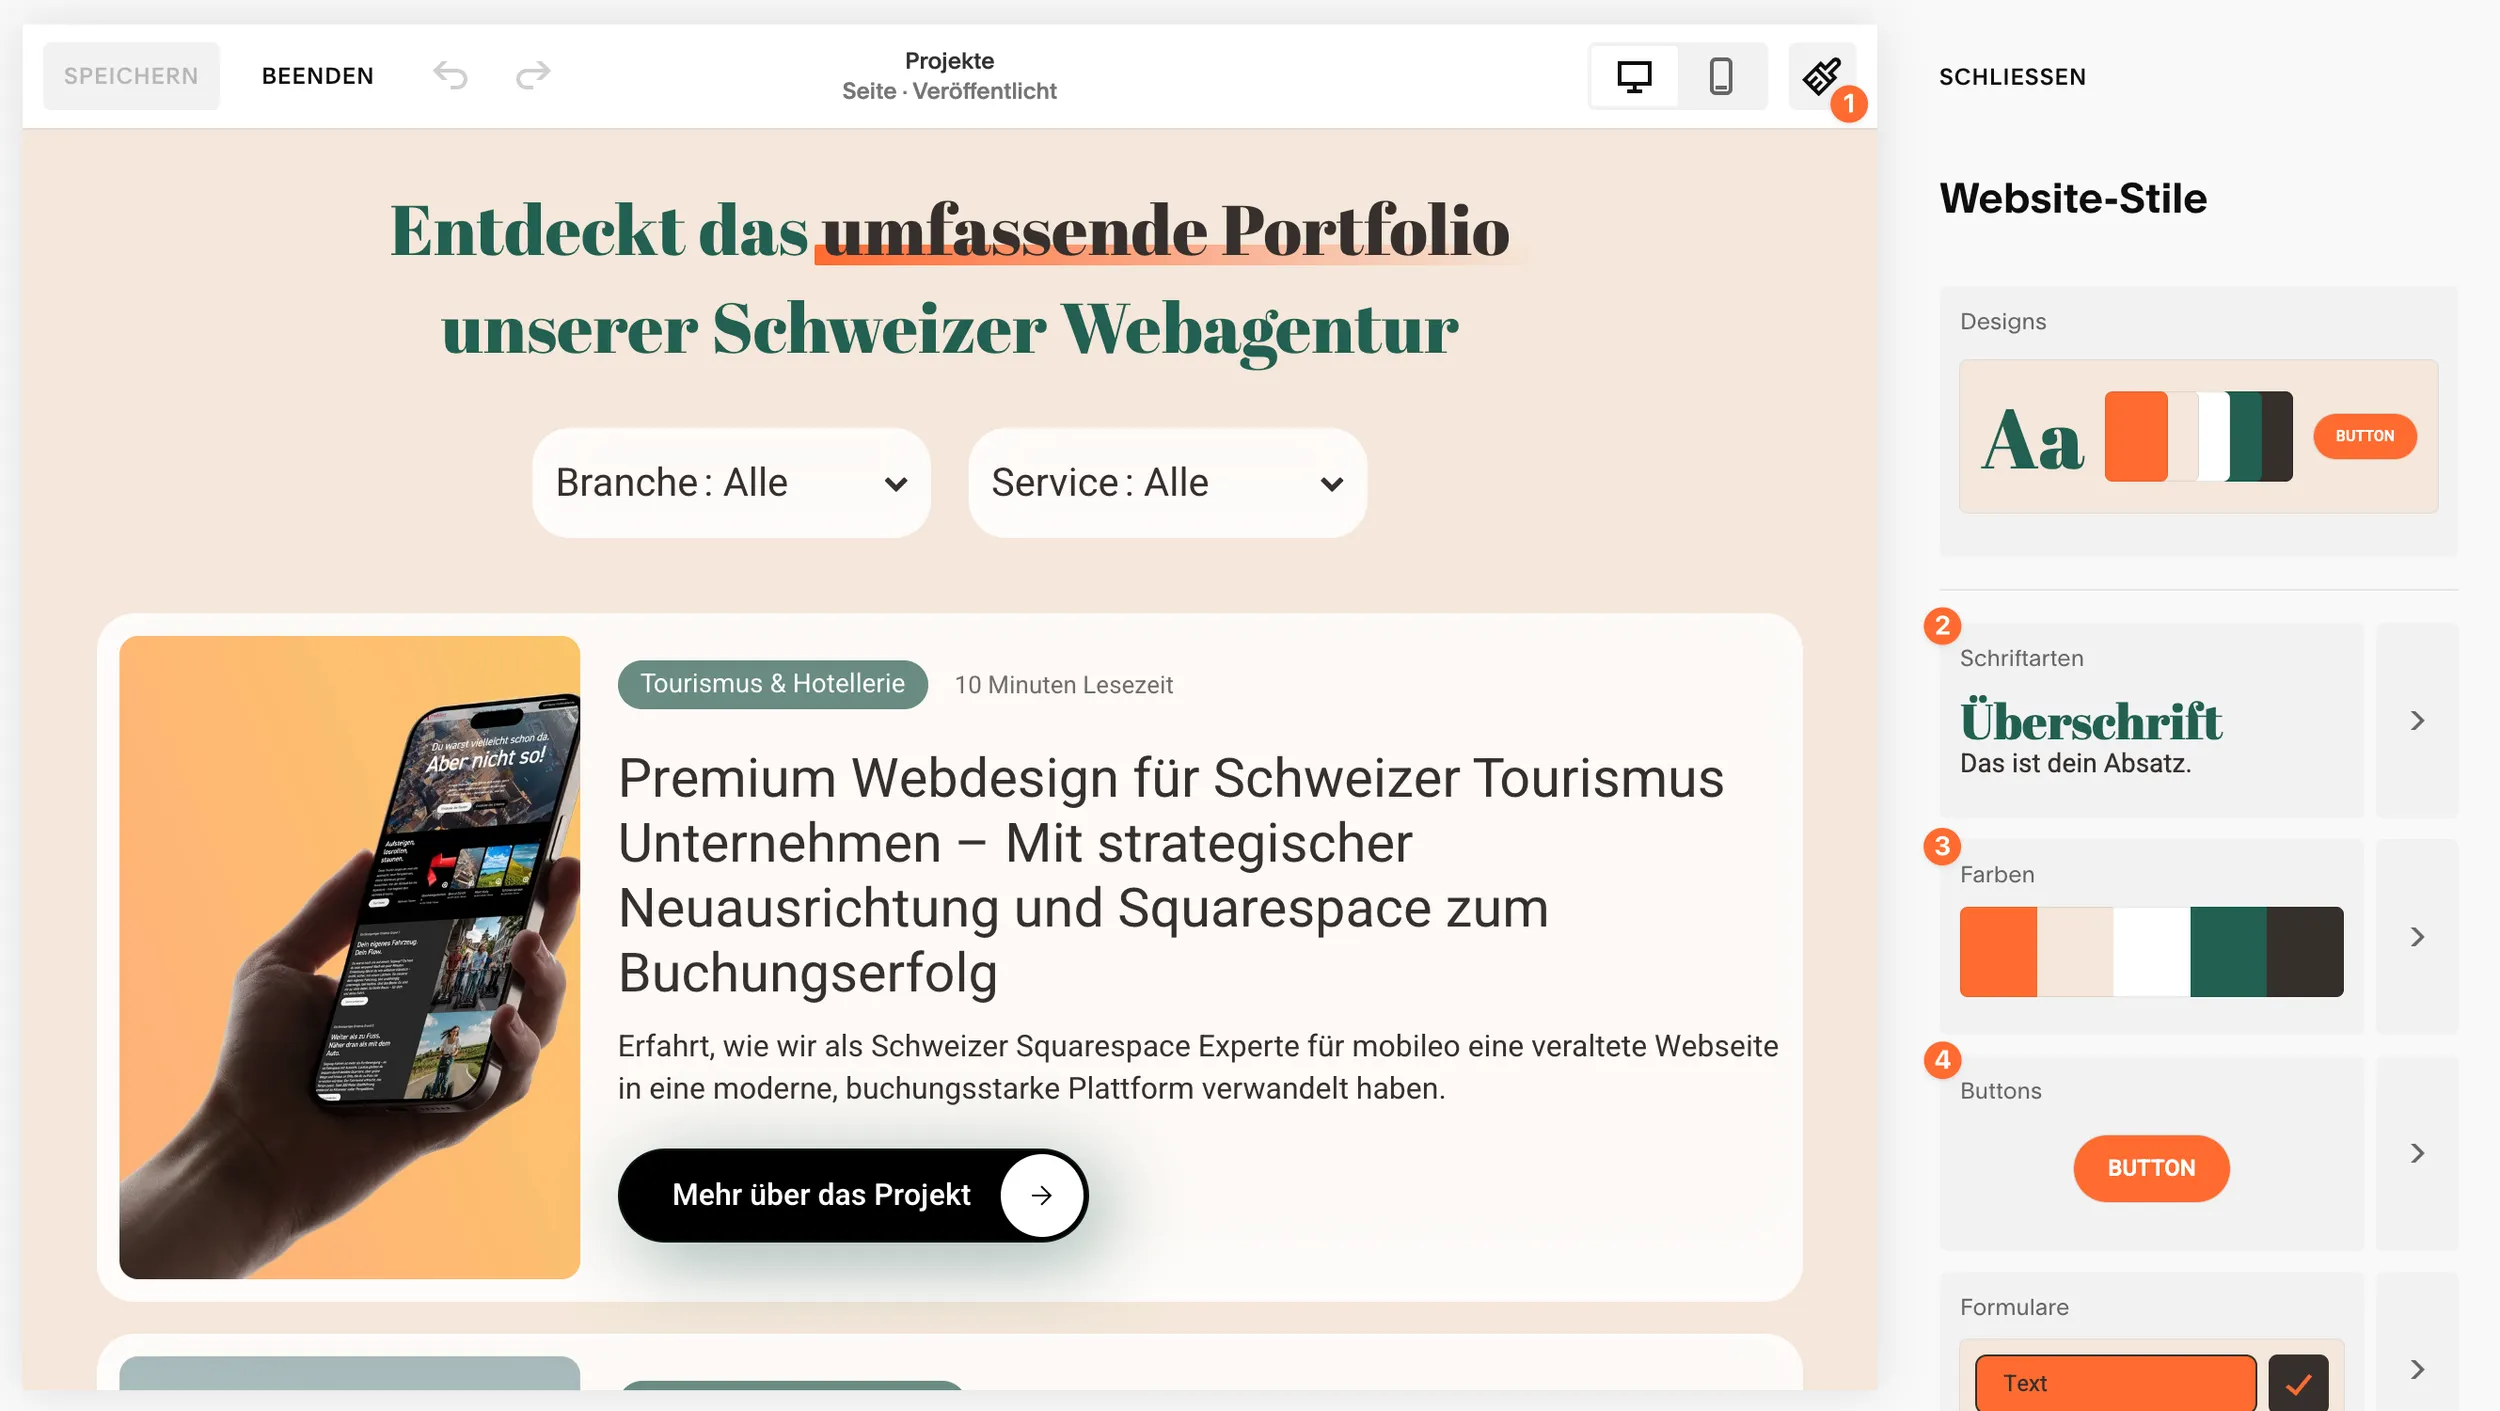
1. The design panel
- Your central tool for a consistent and professional look – under Design > Website Styles
2. Fonts
- Choose a font pack that suits your brand
- Adjust font, size and weight for each text level individually
- For maximum brand consistency you can upload your own font files
3. Colours
- Choose a predefined colour palette or create your own with brand colours
- Assign different “themes” (light, dark, accent) to individual sections
4. More global styles
- Animations for loading elements
- Set spacing between elements and button design globally
Upload your own fonts: For maximum brand consistency you can upload your own font files (e.g. .ttf, .woff) via Design > Custom CSS > Custom Files. After uploading, you need to add a small piece of CSS code to assign the font to the desired elements.
Step 6: Connect the domain – your address on the web
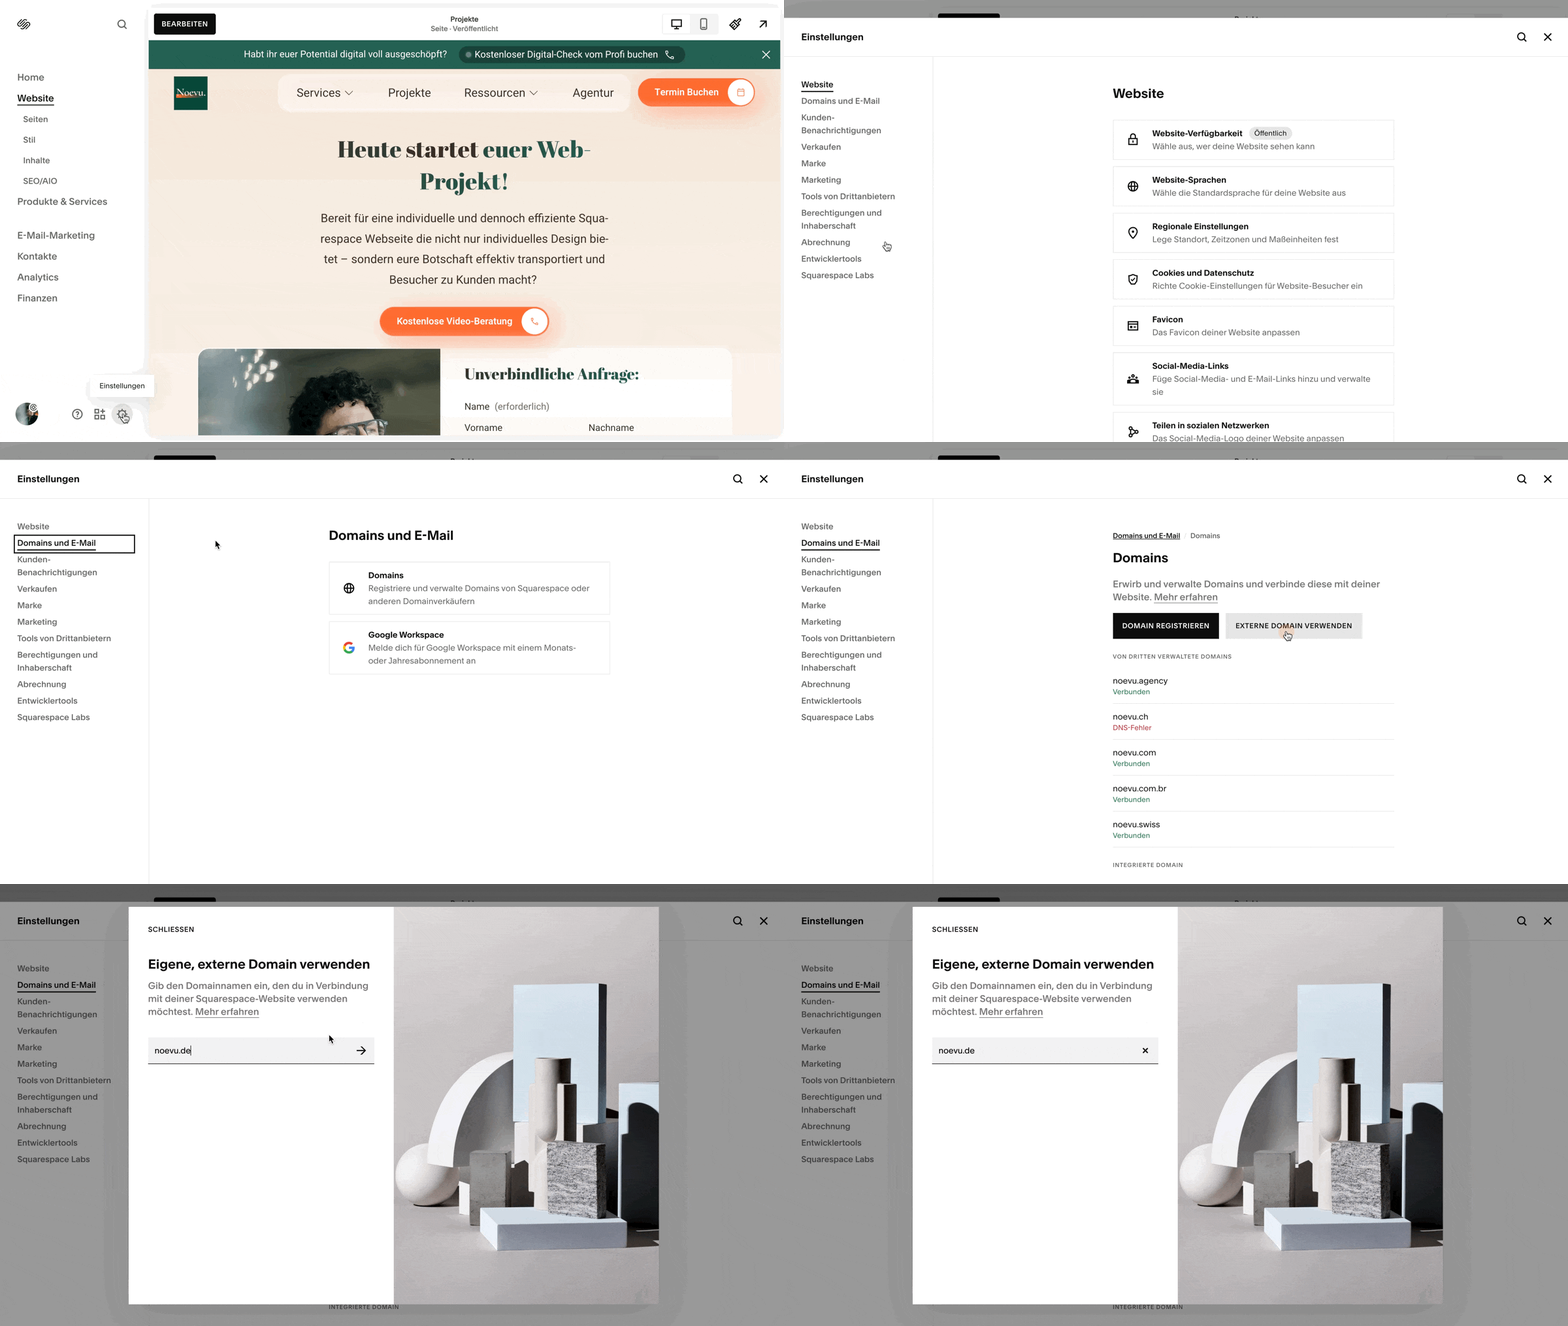
Your own domain is essential for a professional appearance. You have two options:
Option 1 – Register a domain with Squarespace: This is the easiest way – but unfortunately it is not yet possible for Swiss domains with the .ch or .swiss ending. If you take out an annual plan, the domain is free for the first year.
Option 2 – Connect an external domain: If you already have a domain with another provider such as Hostpoint, Infomaniak or Green, you can connect it to your Squarespace website. This is often the cheaper and more flexible option.
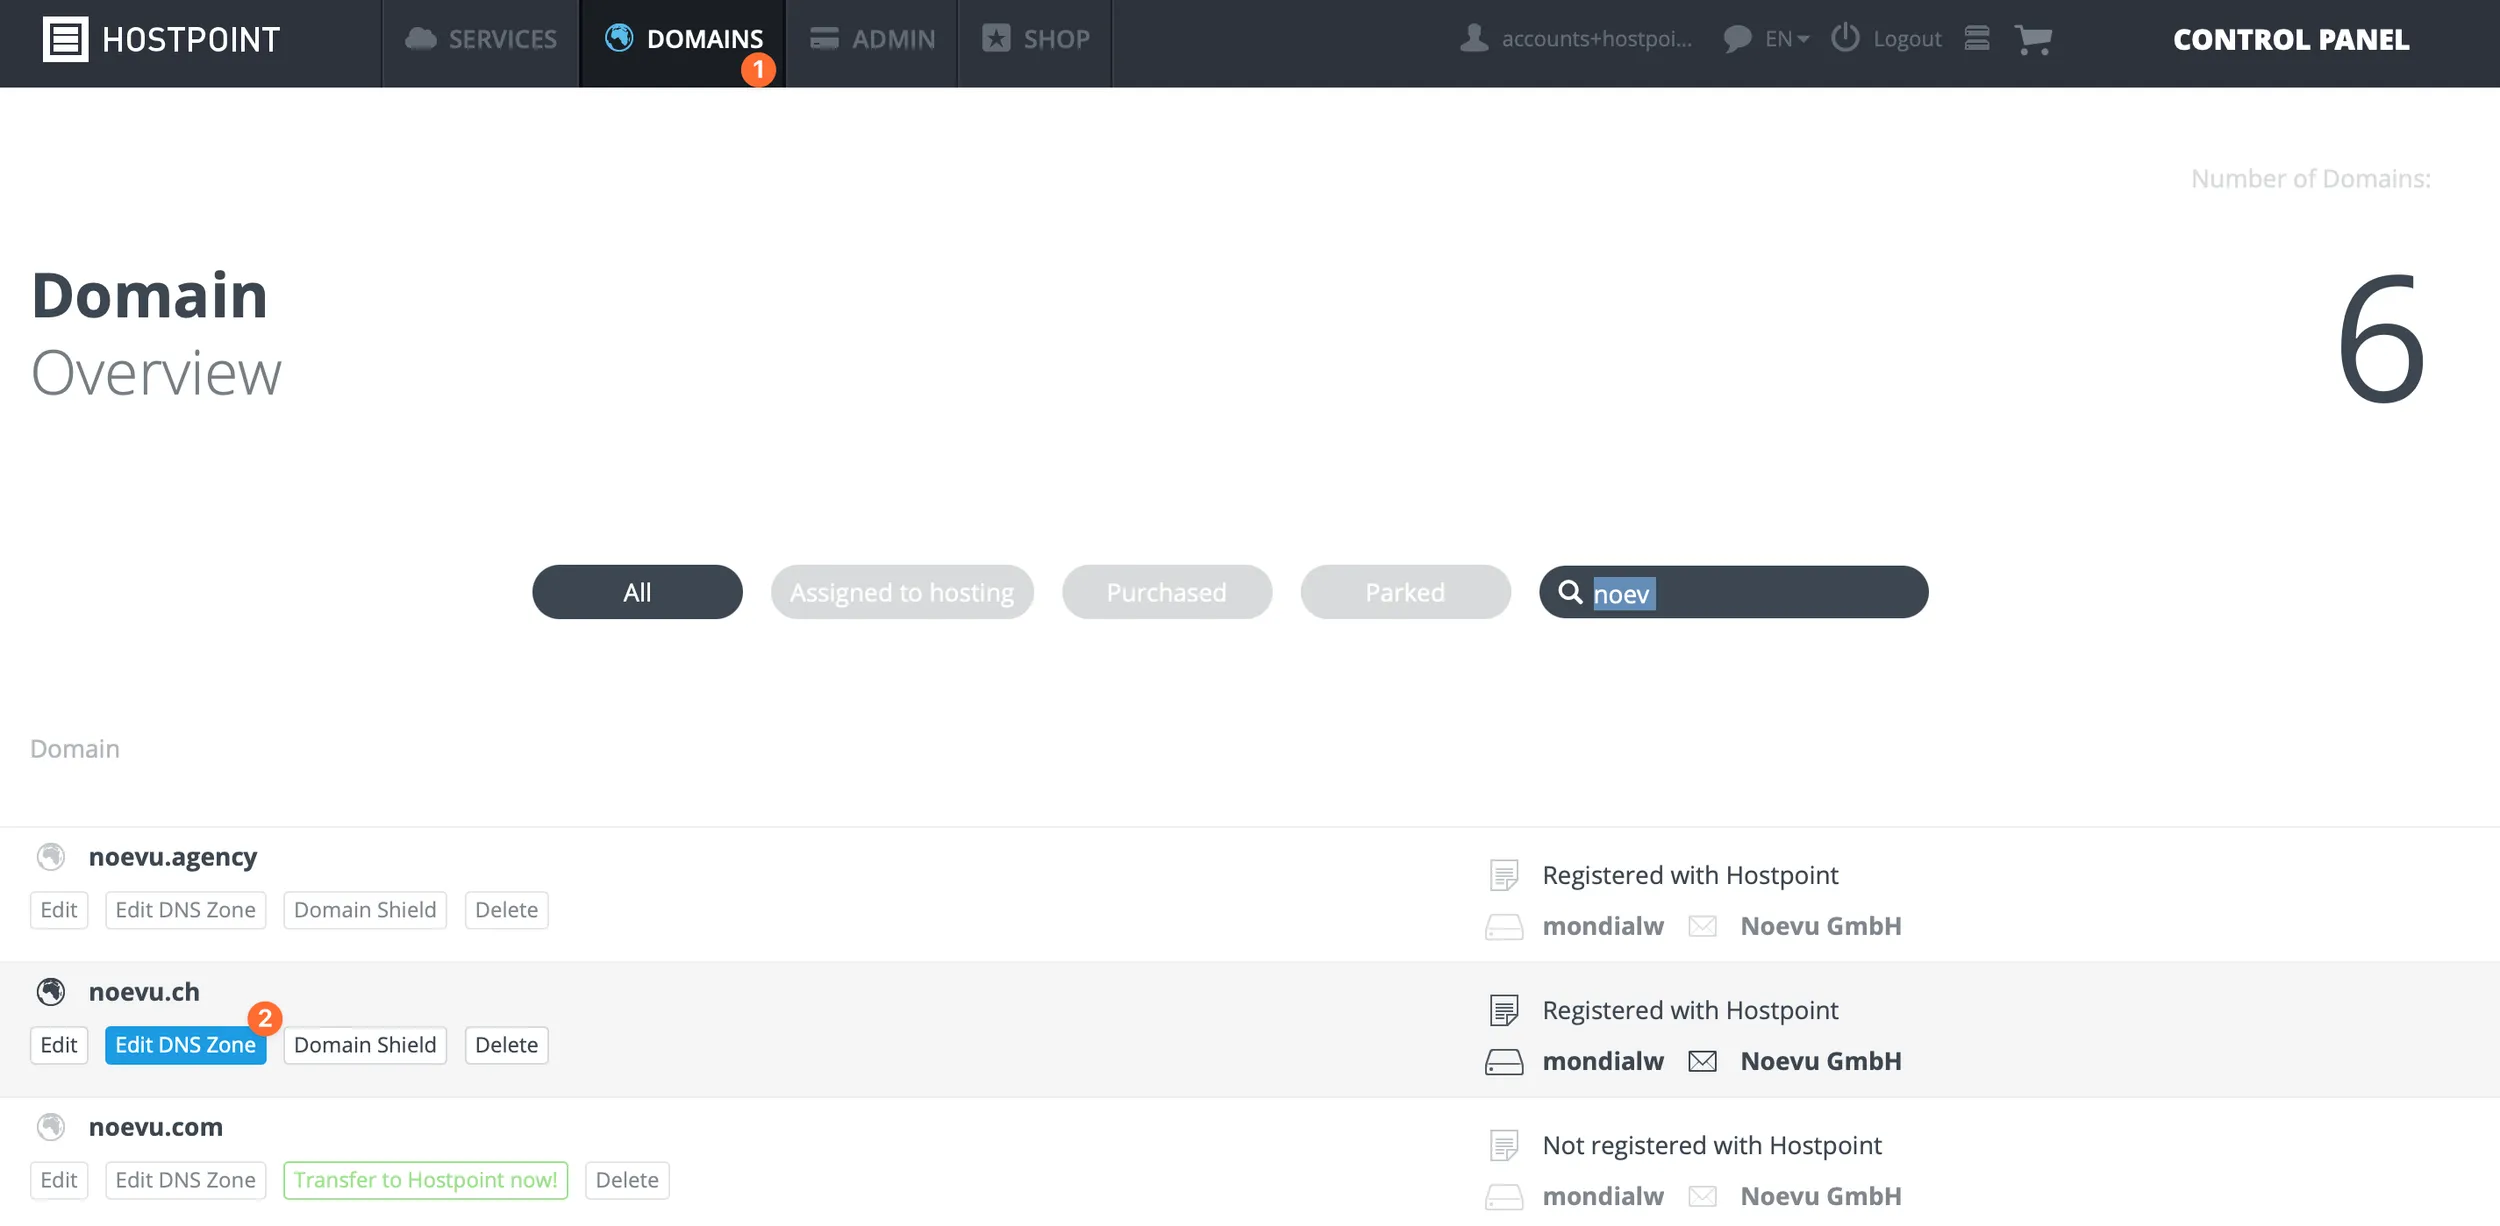
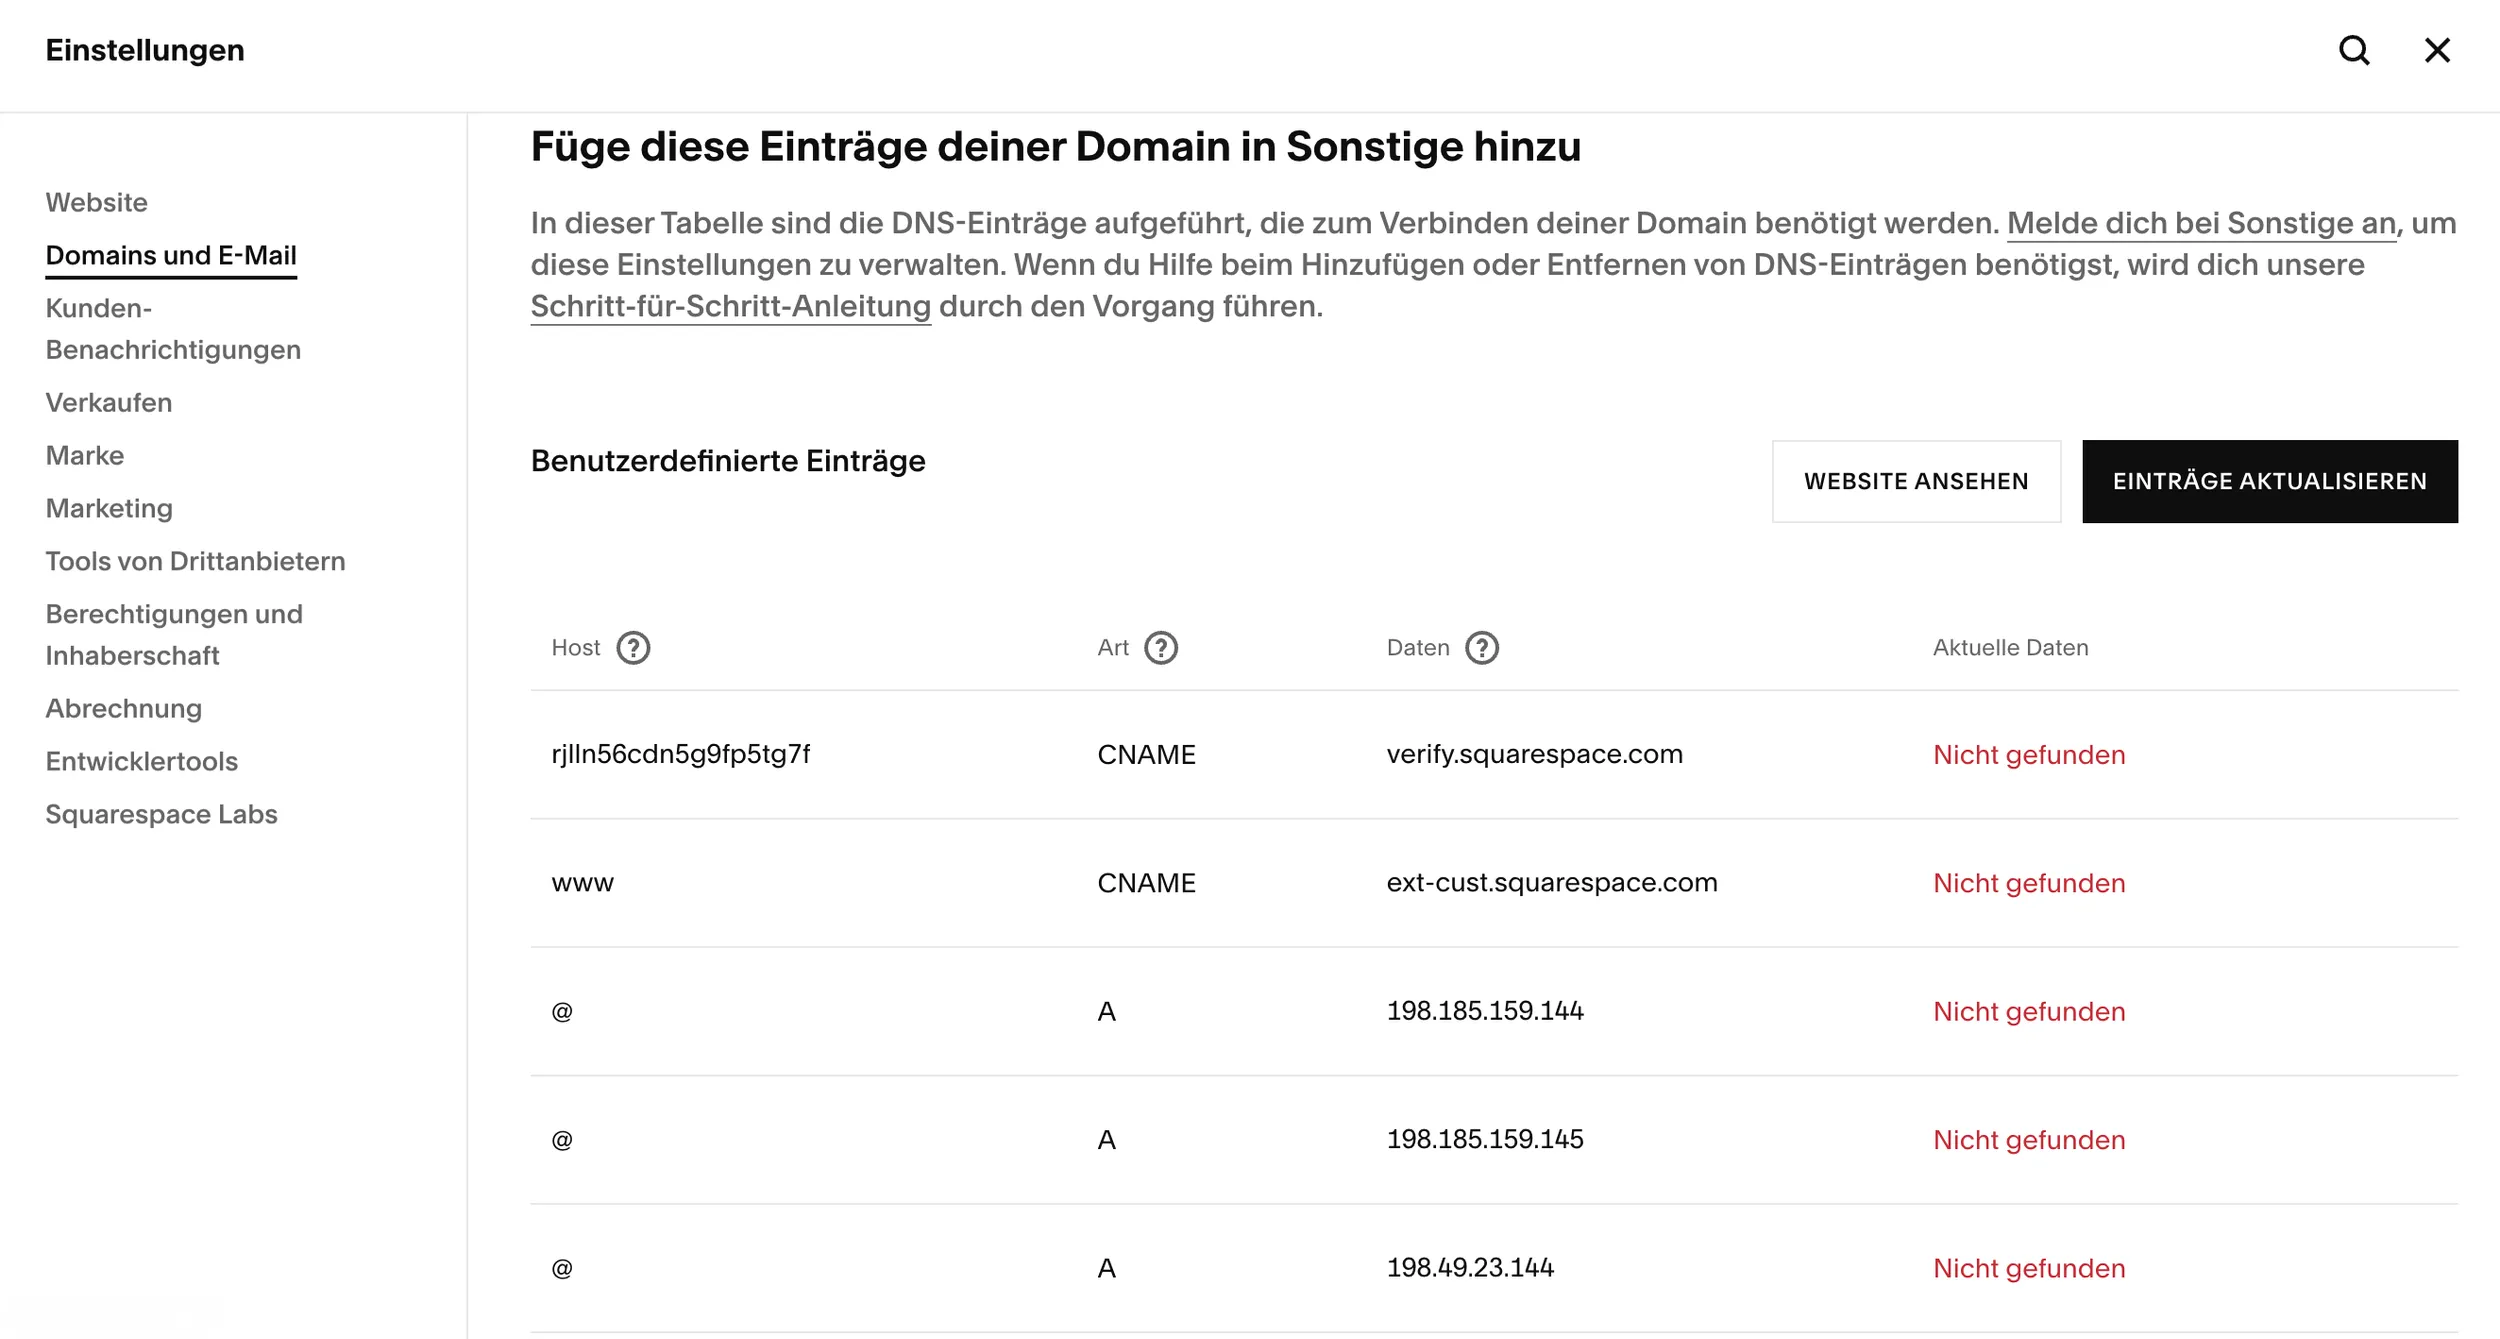
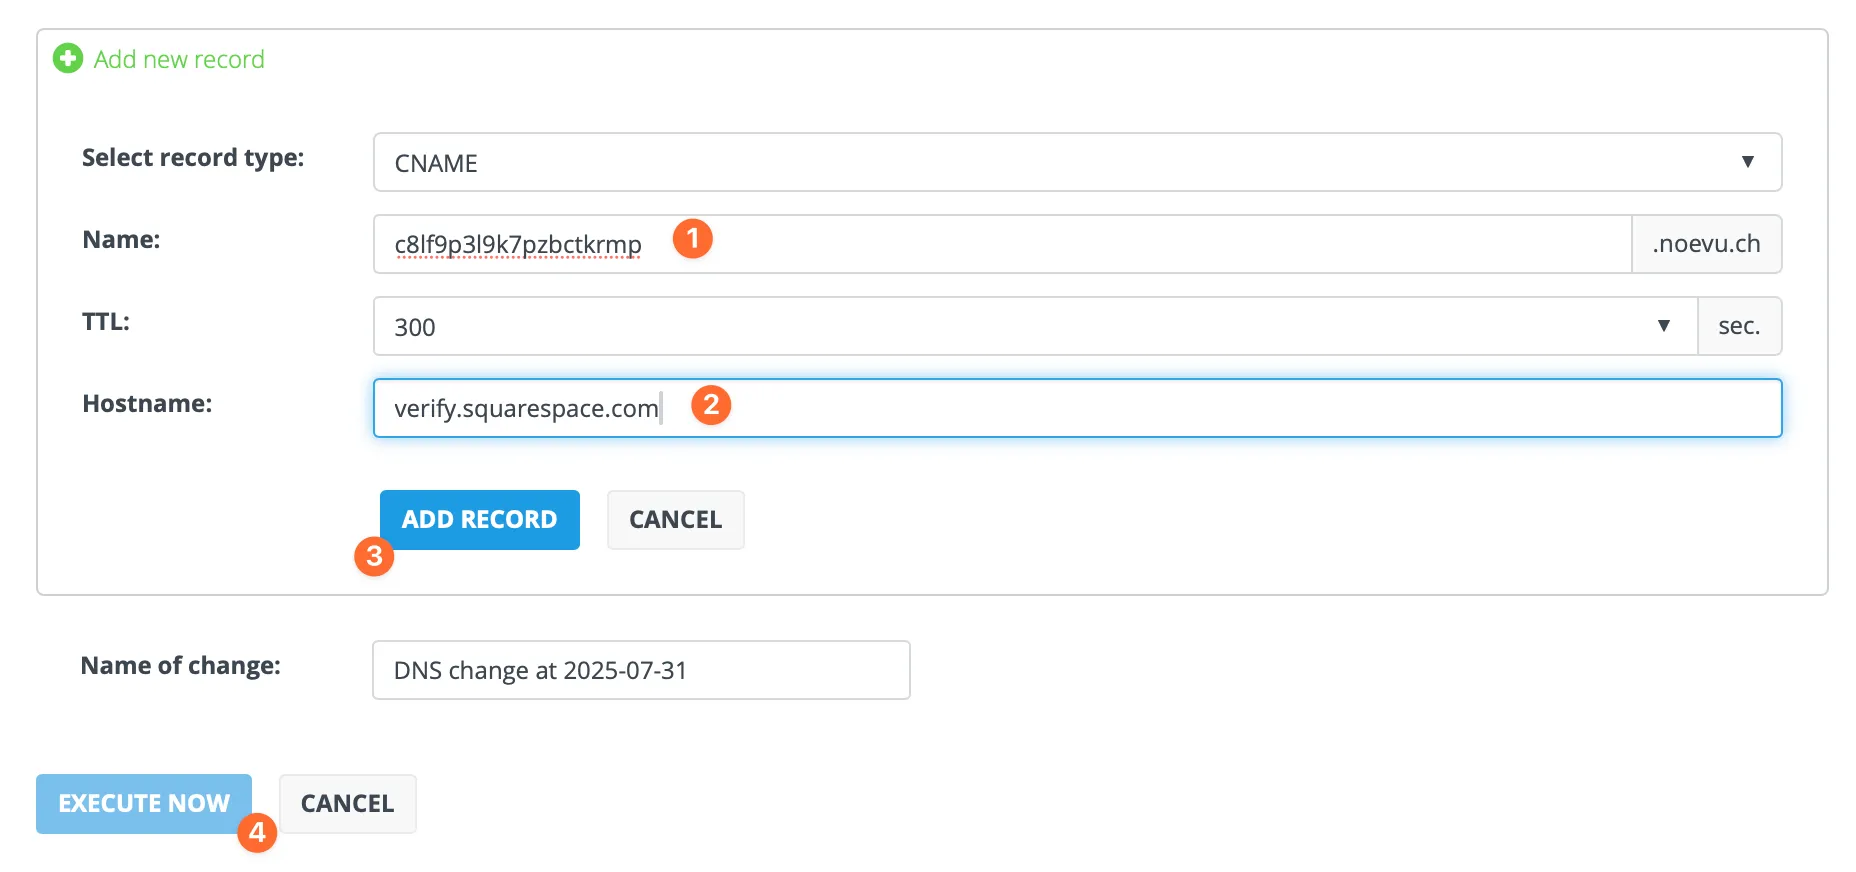
First CNAME entry: A unique code that points to verify.squarespace.com – for verification.
Second CNAME entry: The host «www» must point to ext-cust.squarespace.com.
A records: Create four new A records that point to the IP addresses specified by Squarespace.
After saving, it can take 24 to 48 hours for the connection to be active worldwide.
The most common domain pitfall: Squarespace does not offer .ch or .swiss domains. Anyone who wants a Swiss domain has to buy it from an external provider (Hostpoint, Infomaniak, Green) and connect it manually. That costs a few hours of extra effort — but it is the right decision. .ch domains noticeably strengthen trust with Swiss customers.
Step 7: Go-live — publish your website
The final step is the most exciting: presenting your website to the world.
Pre-launch checklist
- Check every page on mobile devices (smartphone, tablet)
- Click every link and every button to make sure they work
- Fill in your contact form as a test
- Proofread all texts one more time
Switch from “Private” to “Public”
- Navigate to Settings > Site Availability
- Private: the default for test websites – only invited contributors see the site
- Password protected: ideal for showing it to selected people before launch
- Public: your website is visible to everyone and is indexed by search engines
To choose “Public”, you must first take out a paid subscription. Select “Public” and click “Save”. Congratulations, your website is now live.
Ready to put your new Squarespace website online? Noevu's go-live checklist for Swiss SMEs ensures that the click is a reason to celebrate.
In-depth: mastering popular use cases
With the basics you can already create an impressive website. Here are two detailed guides for the most popular use cases.
Excursus 1: Build a professional blog with Squarespace
Squarespace is an excellent platform for bloggers who value design.
- Add a Blog page: create a new Blog-type page from the Pages menu as your blog overview page
- Create posts: click on your blog page in the Pages panel and use the + button to add new posts. Each post is like a small page of its own
- Organize with categories & tags: use categories for broad classification (e.g. “Marketing”, “Design”) and tags for specific keywords (e.g. “SEO”, “Color theory”)
- Customize the blog design: click «Edit section» to configure layout (grid, list), excerpts and «Read more» links
Excursus 2: Set up an online shop and sell products
With the Business and E-Commerce plans, your website becomes a powerful online shop.
- Basics: make sure you have at least chosen the Business plan. For commission-free sales an E-Commerce plan is required
- Add a Shop page and products: add a Shop-type page and create physical products, digital downloads, services or gift cards
- Connect a payment provider: link your account to Stripe (credit cards, Apple Pay) and/or PayPal under Settings > Payments
- Set up shipping and taxes: define shipping zones and costs, store VAT rates for different countries
- The first sale: draw attention to your products via social media or discount campaigns
After the launch: how your website gets found on Google (SEO checklist)
A common myth says that website builders like Squarespace are bad for search engine optimisation (SEO). That is outdated and simply wrong. In fact, Squarespace offers an excellent technical foundation for SEO and integrates all the important tools directly into the user interface – without any extra plugins like in WordPress. The platform automatically takes care of a clean HTML structure, the creation of a sitemap.xml, SSL encryption and mobile-friendly designs.
Squarespace's integrated approach is a deliberate design decision. Instead of overwhelming you with selecting and configuring dozens of SEO plugins, the 80% of features that 90% of users need are already in place and easy to access.
Global website settings
- Set the site title and SEO description under Marketing > SEO Checklist
- Connect Google Search Console to see how Google perceives your site
- Upload a favicon under Design > Browser Icon
Optimisation of each individual page
- Enter the SEO title and description per page via the gear icon > SEO tab
- Upload social-sharing images in the Social Media tab
Optimising your content
- Keyword strategy: research which terms your target group enters into Google
- Heading structure: use H1, H2, H3 hierarchically – only one H1 per page
- Alt text for images: briefly describe what can be seen in the image
Local SEO for local businesses
- Connect to your Google Business Profile under Marketing > Location Management
- Sync address and opening hours for better visibility in local searches
You will find a detailed comparison of Squarespace with WordPress, Wix and other platforms in the article Squarespace for SMEs: Pros and Cons.
Prefer to have your Squarespace website built professionally? A short conversation will clarify which approach fits your situation.
Conclusion: your path to a professional website with Squarespace
Squarespace is a strong choice for anyone who wants to combine ambitious design with simple handling — without worrying about hosting, updates or security patches.
With this step-by-step guide you can build your website on your own: from the first template via design and the domain through to SEO optimisation after launch. Start the free trial now and work through the individual steps.
If you need support: Noevu's Squarespace experts are happy to help. Anyone who would rather hand the steps over can get a website built.

Not sure if everything is set up correctly? Book a free online consultation for a professional review of your website.
Frequently Asked Questions
Is Squarespace really free?
No. Squarespace offers a 14-day free trial to try everything out. However, to publish your website and get it online, you need a paid subscription. There is no permanent free plan.
Can I use my domain from another provider (e.g. Hostpoint, Infomaniak) with Squarespace?
Yes, absolutely. You don't have to buy your domain from Squarespace. You can connect an existing domain from any provider to your Squarespace website via DNS settings.
Do I get an email address for my domain?
No, a professional email address (e.g. [email protected]) is not included in Squarespace plans. However, you can purchase it as an add-on through a partnership with Google Workspace, which incurs an additional monthly cost.
How good is Squarespace's customer service?
Squarespace's customer service has a good reputation. It is available 24/7 via live chat (English) and email. Email support is also offered in German.
Can I change my template later?
In the current version 7.1, “changing” the template is no longer necessary, as all designs have the same functions and are completely customizable. You can completely change the look of your site at any time using the Website Styles panel.
Is Squarespace GDPR compliant?
Squarespace as a US company provides the technical tools to operate a GDPR-compliant website (e.g. cookie banners, SSL encryption). However, the responsibility for the correct implementation - such as creating a correct legal notice and a data protection declaration - lies with you as the website operator.
Can I switch from Squarespace to WordPress?
Yes, a change is possible in principle. However, Squarespace's export capabilities are limited. You can export your blog posts, pages and comments as an XML file, but elements such as products, theme settings or special blocks must be recreated manually. But this is the case with practically every CMS change.